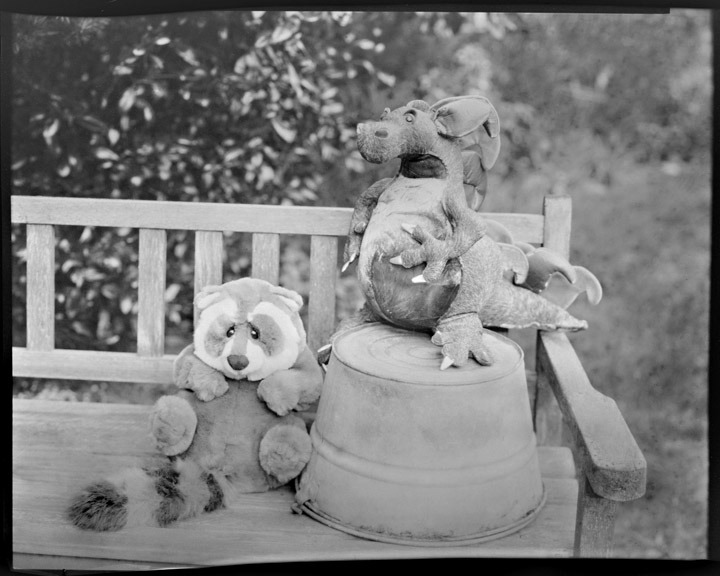
Print from an 8"x10" handmade film negative (Lens: Antique 12" Wollensak Betax No4)
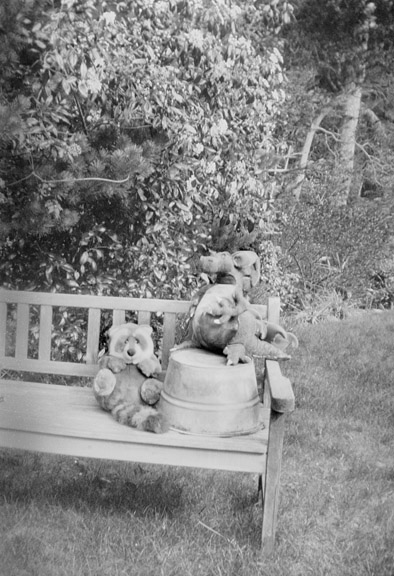
Print from handmade 120 roll film exposed in an old 'Kodak Brownie Target Six-20' camera.
Below left: negative scanned at 4000 ppi with a Nikon 9000ED. Below right: Section of 120 strip, scanned on a flatbed. This strip has seven exposures, all printable, and #'s two thru five are very nice.
 |
 |
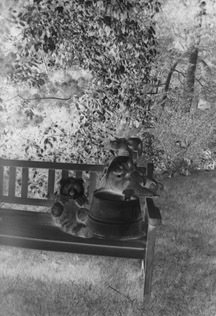
Enlarged crop from the Brownie print. | |
Glass is beautiful. Glass is inexpensive. Glass is re-useable. Glass almost coats itself.
Glass is HEAVY.
I’m afraid — for me — ‘heavy’ is winning the argument. I’ll probably always coat glass dry plates, if for no other reason than to stay in practice and to occasionally use some of the dry plate holders I’ve collected. And, in truth, a glass dry plate negative is a thing of beauty unto itself. But using film is more practical for me. I’m not quite ready to be tied to roadside photography or studio still-lifes, and carrying a pack of glass plates has been feeling like more of a hurdle than an enjoyable challenge. Someone younger, stronger, more ambitious, maybe with a pack mule, might likely feel otherwise.
The problem that needed to be addressed is the limited availability of factory-subbed polyester in non-commercial quantities. Subbing polyester film so that emulsion adheres is a trick that the home darkroom probably can’t handle (and no one hopes more than I that I’m wrong about this.) I finally un-bent my pre-conceptions about ‘film’ and went back in time before polyester to cellulose acetate. The irony is that acetate actually matches up timeline-wise with the emulsions I make. For some reason I had picked up the idea the whole process was going to be incredibly difficult. The truth is that it’s incredibly straightforward. DIY is, of course, by nature a little fussier than buying off-the-shelf, but making film at least has the perk of being a lot of fun. And, for me, it completes the circle. Not the least is that I love medium format and 120 film. I am at long last closing in on a project dream I’ve had since I started making emulsions four years ago — photography with my Kodak Brownie Target Six-20 camera collection. I have ten Six-20’s just begging to be used again.
Cellulose acetate got a bad reputation primarily because of its last version — triacetate. Triacetate was in a lot of ways a better film than its predecessor, di-acetate. It was strong, flexible and durable. Unfortunately, in hot and humid storage conditions it practically disintegrates. Acetic acid released by the decay gave name to the infamous ‘vinegar syndrome’.
Fortunately for my aching back, diacetate film is still readily available,
very inexpensive and quite satisfactory for our purposes.
http://www.dickblick.com/products/grafix-clear-acetate-sheets/
with technical information here:
http://www.grafixplastics.com/biodegradable_film.asp
I'm using 5 mil roll film for 120 coating and 5 mil and 7-1/2 mil sheets for LF film.
Coating technique is the same as for dry paper.
Emulsion: Currently, I'm using 'TLF#1' with the only adaptation for film being a few drops of Photoflo 600 in the finals. Developed in 'PF BW-65' 1:1:1.
SUBBING RECIPE: From 'Photographic Emulsions: Their Preparation and Coating on Glass, Celluloid and Paper, Experimentally, and on a Large Scale.' by Edward John Wall, 1929. (Kirk Keyes has placed a pdf of this book on his website. http://www.keyesphoto.com/KDKtech%20-%20E.%20J.%20Wall%20-%20Photographic%20Emulsions.html)
I'm using the recipe at the bottom of p.187 with the acetone variation. Where Wall recommends a ball of cotton, I am covering a plastic shower squeegee with two sheets of Webril Handi-Pads cotton (http://www.artstuff.net/webril_wipes_and_pads.htm) and then covering that with a piece of old, soft cotton bed sheet, cinched on tight with plastic mini-clamps from Home Depot. I keep the subbing mix at 55ºC in a 9"x13" Pyrex baking dish on my lab hotplate. Tip: If you don't love the smell of nail polish remover and pickles canning on a hot stove, make sure you have good ventilation.
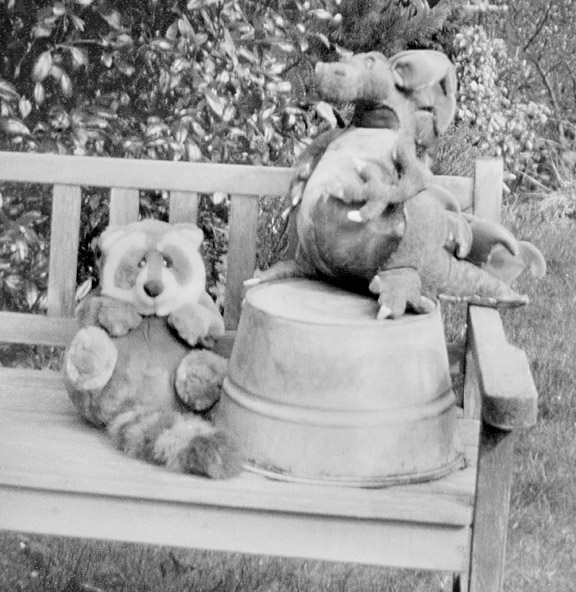
Big film negatives are an advantage when it comes to printing. You can either contact print in a modern-sized printing frame, or you can photograph the negative on a light table. Either way, you don't need expensive enlargers and/or scanners. I much prefer photographing glass plates — and now, film — to flatbed scanning.
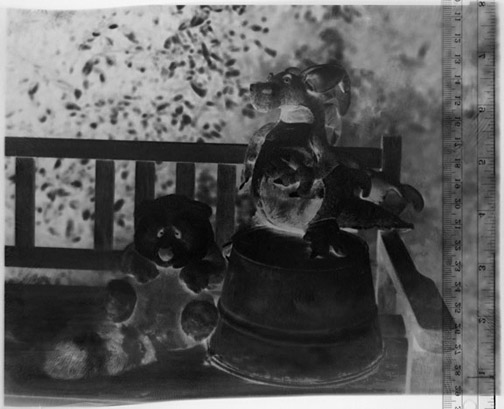
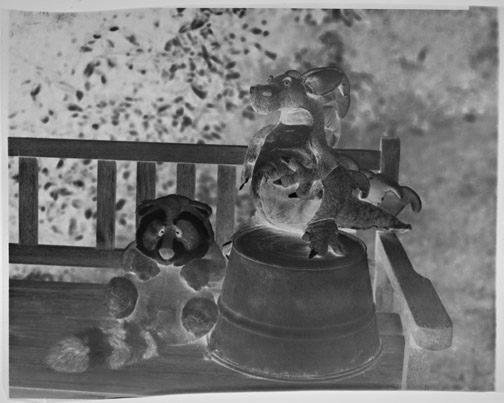
Below left: 8"x10" negative scanned (with plastic ruler for illustration) on a flatbed. Below center: Same negative photographed on a light table with a Pentax K20 (14MP) and 35mm macro lens. Below right: A straight invert of the Pentax file. The final image required only a light touch with the Burn/Shadow tool. It is the image that heads this page.
 |
 |
 |
One more tech note: Whether or not you want a decidedly handcrafted look or you just want to maximize expensive emulsion to the last drop — selvages don't have to be trimmed. In my 8"x10" negative you can see that the emulsion didn't cover the entire area, yet the edges weren't too thick to develop and fix at the same rate as the middle of the coating area.
For the rest of all the little details: I don’t want to be too directive. I could type a thousand words here that won't do as much good as actually getting your hands dirty with your own efforts. And, needless to say, I haven’t by any means perfected all the techniques, tricks and recipes. Once you are pointed in the general direction, though, I think things are pretty intuitive.
And, a note from the pulpit: If all the facets of silver gelatin emulsion making are going to go forward and grow they can’t have only my idiosyncratic stamp on them. Other people need to tackle the issues and share their discoveries. A diversity of ideas is the only way to go forward with breadth and depth.
Make an emulsion. Share the results. Become a Light Farm contributor, whether here directly or with a link to your own site. Thank you.
Denise
editor@thelightfarm.com