Michael Carter's Glass Plate Negative Technique
April 2, 2011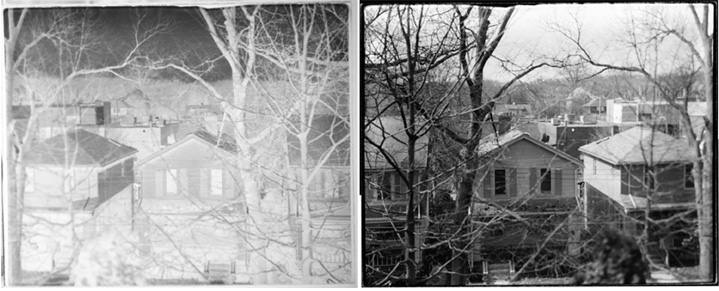
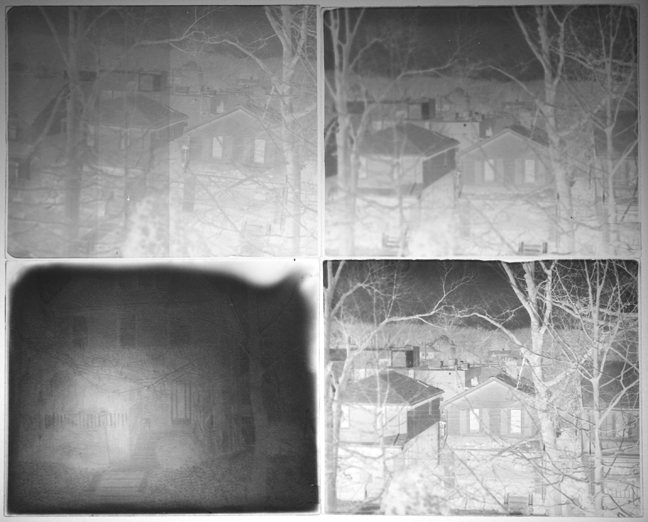
For three weeks I have been working at making 4x5 dry plate photographs. My goals were to clean the glass so that the emulsion sticks, coat the glass evenly, make a drying cabinet, expose the plates correctly, and develop plates to make great negatives. Negatives were scanned into a PC and printed out as 8x10s.
Liquid Light emulsion was used. It had been put into 35mm film canisters last year, about a year ago. They were kept in a box in the cold darkroom in the cellar. Shoe boxes were used at first to dry plates in; they would be changed for dry boxes each day. A Pyrex 2 cup measuring cup was used to heat canisters in. A slab of marble was leveled and used at first to cool plates and later to warm them also. An old hot plate provided heat for the marble slab. A wooden folding chair and a shoe box placed the heater under the slab end. Dektol and Kodak fixer were used to develop with. A recycled plastic spray bottle is used with EverClear. A Sekonic Studio Deluxe light meter, a Bender 4x5 camera, a Primo plate holder, and a Caltar f5.6 lens in a Copal No. 1 shutter were used.
My favored technique was hand pouring the plates. I like the direct feel of holding the plate and tipping this way and that. After the plate had been poured it was set onto the marble to warm a little then it was pushed with my fingernails to the cold end. Drying boxes are plain shoe cardboard ones; however, I made a big one with shelves and a door.
My main idea is to use simple materials, as few of them as possible, and to make lots of notes. The three weeks yielded 74 hand written college ruled 10½ x 8 inch spiral bound pages. They are in the process of being typed, corrected, edited, illustrated and published. It takes three or more rewrites to have them make sense.
Hot and cold water was adjusted to about 120 F in a 2 cup Pyrex measuring cup and some film canisters put into the water to warm up. The water would cool and be warmed again one time. It would take almost 20 minutes. Any less than that and a lump of unmelted emulsion may fall out of the canister onto the glass. Canisters not being used would remain in the cooling water as I poured the plates.
Glass was cleaned and in a drying rack where I could find it in the dim light. It had been scrubbed with Calcium Carbonate and EverClear 155½ proof alcohol, using a 1¼ inch paint brush in a 4x6 inch tray. A close fitting tray is essential as the plate becomes slippery and the glass moves easily. Nothing can hold it. I dropped one plate into the plastic sink and broke it. The plate was washed with hot running water then placed onto a small piece of rubber padding. It was sprayed with EverClear so the plate would stay as I rubbed it with a paper towel on both sides. It was important to keep the picture side ever in mind. One side squeaks differently than the other according to an article I'd read on The Light Farm. Some plates were recycled; I washed the emulsion off the plates with Clorox Cleanup Bleach. Rubber gloves were worn. Rinse was under warm water. They were put into the drying rack and sprayed all over with EverClear. The emulsion sides all face the mark on the rack. More plates will be needed from Master Hardware. Upon inspecting the six plates I found that they had dried clear, without any water spots at all on any of them; that was unusual. There was some slight residue; it should wipe off with paper towel and more EverClear. All of the edges are sharp; they should be sanded for safety, but I won't and will need to be extra careful.
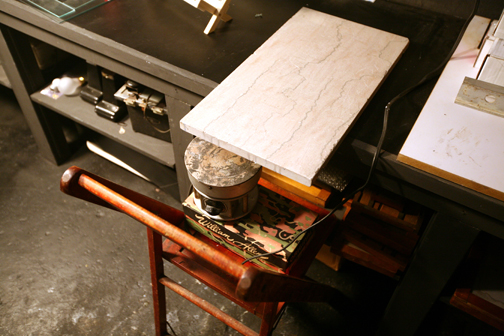
The marble slab was stuck out over the edge of the table like a diving board. Under it was the heating plate. The marble warmed in the rising air as the emulsion cans floated in the water. When the stone was warm to my hand, not hot, I turned off the heater, or down then off, and began. It had to be moved out from under the stone to control the temperature.
A canister was removed from the water, now 100 degrees F, usually more, but by the end of a few cans, it was lower. A glass plate was put onto the warm end of the stone for 10 sec as I popped off the lid to the film can. The glass was balanced on my left finger tips and half a can of emulsion was poured in a small circle onto the glass. I get two plates per can. The glass is poured right next and close to the stone so all I need do is turn and lower it onto the warm end. The glass is tipped ever so slightly this way and that and the emulsion is allowed to fill each corner. Hardly any movement is required; all you need do is to think about it; movement is minuscule.
Warmer emulsion will not pour out of the front of the canister but will break surface tension and run down the side of the can and off the back. Warmer emulsion or glass that is too warm will spread emulsion very fast on the glass and it will most likely spill off.
It is worth the experience to pour one plate like this in the light so you can see what you are doing. I did that after ruining many plates in the dark. After I poured one in the light, I never ruined another. Emulsion was poured so that it mounded up; a full half can was used; that is 15 ml; surface tension around the outer edges holds it on the glass; it spreads almost by itself because of the extra height of it where it is being poured, especially if under 100 degrees. Cooler is better but warmer is faster.
A plate must be placed on a warm flat surface to spread. Not much time is needed, only about 15 seconds. Where the emulsion first contacts the plate during a pour will make a circle that is thicker because it cools the plate there I guess. Even if emulsion is spread with the finger tip it will smooth out flat on the warm surface. The final heat is what makes emulsion flat.
The plate is not lifted off the stone while warm and fluid, but pushed horizontally on the smooth surface of the marble. The other end of the stone is stone cold and cools the glass then the emulsion rapidly. There is room to push four plates to the cold end. That is when the two coldest ones are moved over to the drying box. Two more are then readied.
Film canisters are not returned to the warm water after half has been used but left out in order to work fast. Emulsion cools some that way, but the plate is warmed and one counteracts the other. It is faster and less aggravation in the dark to keep the can close at hand. Spills are wiped up with paper towel. Sometimes emulsion will run off the plate on the marble; it may be wiped off next to the glass; or it may be pushed back onto the glass some. I've done both and had all plates perfectly flat and smooth to use. I did try using my finger tip and a glass rod while empty glass sat on the warm stone but prefer to tip the plate in the air and place it carefully onto the stone afterwards. I hardly ever spill a drop anymore.
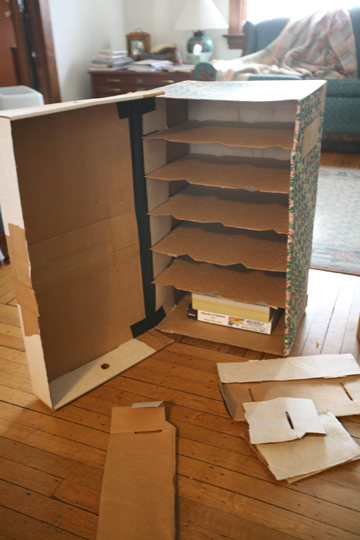
Plates are allowed to dry three days. Cardboard boxes are covered with black draped cloth.
Plastic dark slides are used in antique plate holders. Fiber dark slides will expand and stick to emulsion.
A bracket test is done first; sure, a plate is sacrificed, but I ruined many more by not bracketing first. Development is in Dektol 1:3 that is one part Dektol, a half cup, to three parts tap water, one and one half cups. Temperature is adjusted to 68 degrees F. Kodak fixer is warmed to 68. Fixer is used as a stop bath, sloshing the plate for 30 seconds before putting it into another tray with much more fixer in it. Wash water runs slowly at 68 degrees also.
Emulsion sticks to the glass. Fixer clears emulsion like glass. Developer turns exposed silver black. Therefore a white tray is used to see the plate turn black. A red tray is for stop bath. A black tray is used to watch milky white emulsion turn invisible and a blue tray is used to wash in. I can see the black image a little even in the blue tray. An amber safe light is bright after half an hour and I can see everything in the room.
Unexposed plates fix out crystal clear.