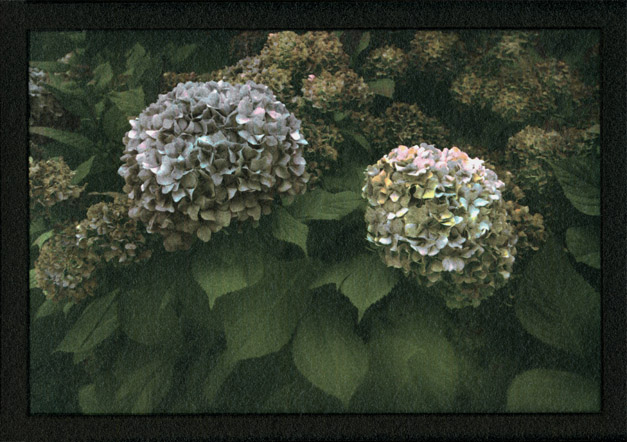
It seems only natural to return to the
beginnings of emulsion history and combine that with an art form that is
essentially unchanged from its own beginnings, and then add digital
color separations to create something brand new. I'm calling it
Silvergum; three-color gum over silver gelatin emulsion.
Until now, gum has not gone well with
silver gelatin (at least so far has I've been able to discover).
Commercial papers based on baryta stock are too slick for the gum to
adhere. Gum with platinum or cyanotype have been the main
expressions of the gum-over idea. But, handmade emulsion on
Fabriano Artistico HP watercolor paper (and I'm sure there are other
great papers) is a perfect substrate for gum. The emulsion is
as hard as nails so there is little risk of staining and the original
print acts as a registration base and as a 'K' layer that gives the
final print a beautiful depth.
Gum printing fits with my idea of a
perfect craft. It is possible to get started and continue forever
with the most basic of tools and space. I did all my first
explorations with one good brush and a photoflood bulb. I've moved
on to three brushes! and a UV printer from (Jon) Edwards Engineered
Products.
There are so many excellent sources of
information on the basics and beyond of gum printing, there's no need to
go into most of that here. One point that may be different from
other gum printing is the ease of negative registration. After
each step, dry and flatten the print in a dry mount press. (A clothes
iron over the print inside a couple of sheets of 2-ply mat board or
similar, followed by flattening under a weight works just as well). On a
light table, register the appropriate negative (blue, red, or yellow)
with the image and tape it at the top with film tape. For coating,
swing the negative up and out of the way while you brush on the pigment
and then dry it. (I use a hairdryer on low. I live in a very
humid climate and the darn things would never dry without some help.)
When the layer is dry, swing the negative back down - it will
still be in perfect registration - and place the negative/paper sandwich
in a contact printing frame and expose to your light source.
Negative registration is greatly improved
by the addition of digital negatives to the process. With each
step, the paper shrinks just a bit. I've calibrated that shrinkage
(and it's very consistent) for Fabriano paper and my work flow.
Starting with a 3.5 inch high print in mind, I make the original b&w
negative 0.5 mm longer and 0.3 mm wider. There is considerable
shrinkage during the first step. With each color layer there is
just a bit more shrinkage, getting less with each pass. You would
think it wouldn't be enough to matter, but perfect registration makes an
enormous difference in the finished print, and since with digital
negatives custom sizing is one-step easy, why not? A little trial
and error and good notes will quickly establish the calibration that
works best with a particular set of materials and workflow.
The following three pages cover the techniques of silvergum printing
in increasing detail, from basic 3-color and basic 5-color, to an
expanded 'Silvergum Tutorial' on page 4.
April 4, 2010. Material Info Update -
Fabriano Artistico papers: After a number of months of testing, I am
convinced that Fab Art paper has been changed. I started out with Fab
Art X-white HP paper four years ago and have coated just about every
variety of emulsion imaginable on it. As ugly as some emulsions have
been, one thing I felt confident in saying was that they were
bullet-proof — no bubbling, frilling or lifting. That changed about
four months ago. I started getting tiny bubbles of lifting emulsion
during washing. I originally thought that one of my ingredients had
gone old, but after replacing all of them, one by one, I did a whole
range of paper samples again. With any given run of emulsion, only the
Fabriano Artistico papers develop bubbles. I love Fab Art paper, so I
pushed through for a work-around solution. Bubbles are eliminated, or
at the least greatly reduced if I use hardening fixer and follow with a
'speed wash' protocol (short pre-wash, archival washing aid, shortened
final wash, squeegee, dry). dwr

