19. Deep Dive, part 2—Ortho |
|
|
|
A plain silver emulsion can be made orthochromatic and panchromatic—at least an emulsion made with ammonium bromide. A Bit About Filters A silver bromide emulsion is inherently sensitive to UV through blue light. (This is a good time to go search and read about the visible spectrum.) The reason other colors are recorded at all is because there are no pure colors in nature. Some amount of UV and blue light is being reflected off all objects. But, even when an emulsion is sensitized for other colors, UV and blue light will dominate the exposure unless they are held back by a filter. A medium yellow filter (Y8) is the one most often used. It is also known as K2, among other names. I highly recommend that you purchase The Focal Encyclopedia of Photography, Desk Edition, 1962. It is the single best source of the information that is useful to us, and since it's "obsolete", it is cheap. I suggest starting with Abebooks.com. I will touch on a few filter facts here, but there is no replacement for reading the entire 'Filters' section in Focal. It is sometimes hard to wrap your head around how a filter works. A filter predominantly passes its own color—more or less depending on the quality and design of the filter. Filters designed for color separation work pass a much tighter band of color. They are often called narrow cut filters and can be expensive. Fortunately, for most photography, standard grade filters do a fine job, and a medium yellow and/or a yellow-green filter will probably meet 99% of your filter needs. With orthochromatic film, orange and red filters are useless for the same reason we can work under a safelight. The standard rule is that a filter lightens its own color, and to a lesser extent the colors next to it on the spectrum. It has almost no effect on its complementary color. But this is where confusion sometimes arises. The filter "lightens its own color" on the print, not on the original capture material, i.e. the negative. On the negative, a yellow filter will record a yellow object as very dark. More yellow light gets through relative to blue light and thereby increases the exposure on the negative. The total exposure time has to be increased to compensate enough to produce a useable overall density. This increase in exposure is called the filter factor. It is only a guideline, not a constant. The exact increase in exposure time depends in part on the temperature of the light (how blue or red it is) and in part on the spectral sensitivity characteristics of a given film. The classic use of a yellow filter with orthochromatic film is to expose clouds against a blue sky. Without a filter, the blue light blasts the clouds out of existence on the film. With a filter, clouds show up in contrast to the sky. This type of use of filters with black and white film is the reason they are referred to as contrast filters. For more, go here. |
|
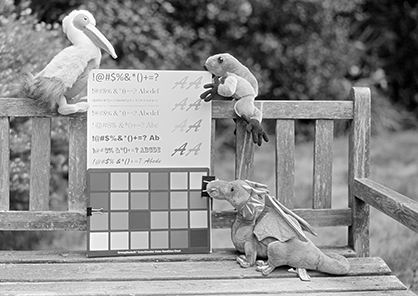
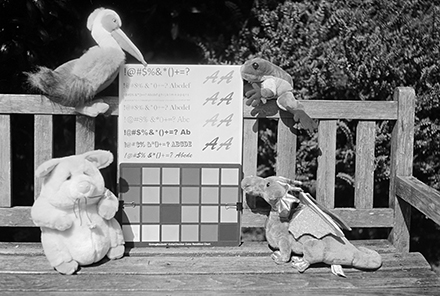
Colorblind vs. Ortho The best way to learn this stuff is with our eyes. 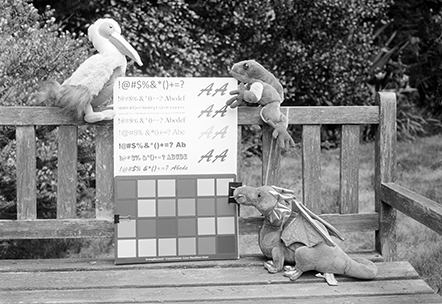

|
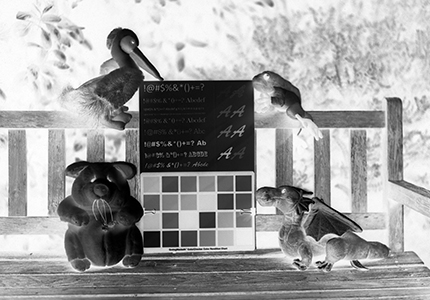
Top left: Colorblind emulsion, no filter. The look of the image is characteristic. For a final print, the color card could be burned down nicely, while maintaining the luminosity of the overall scene. Left: Orthochromatic film with a medium yellow filter. Note the characteristic reds-gone-black (no density on the negative). |
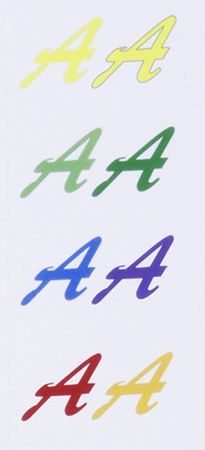
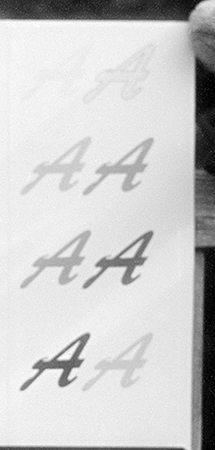
The middle, colorblind crop is tack sharp because it was shot with an excellent Zeiss lens and no filter. The ortho crop is softer because of the old K2 filter I used with the same lens. There is almost an infinity of factors/creative controls influencing every final image. |
|
|
|
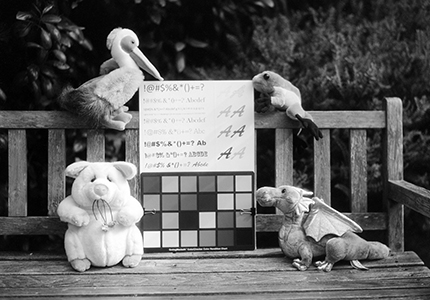
And Speaking of Infinity... |
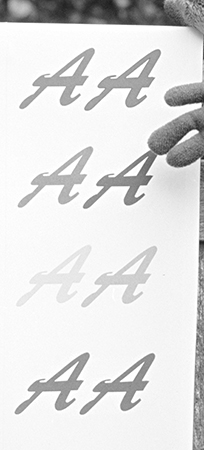
Left:A yellow filter works on colorblind film, too. Just not the same. 
Below: A repeat of the CB and Ortho set above for comparison, but this time with a print of the ortho negative. |
|
|
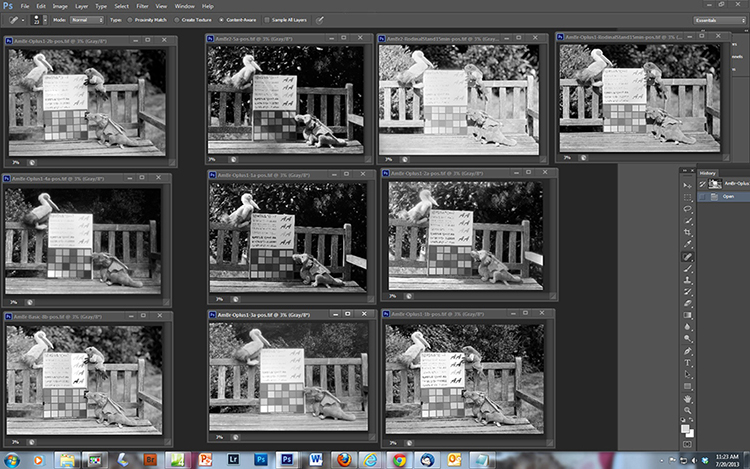
Color temperature is influenced by time of day, time of year, altitude, and weather. The set below have all conditions equal except weather. On the left: heavy overcast. On the right: bright sunshine. AmBr-Ortho. No filters. 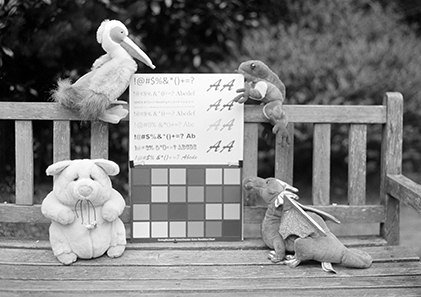
|
|
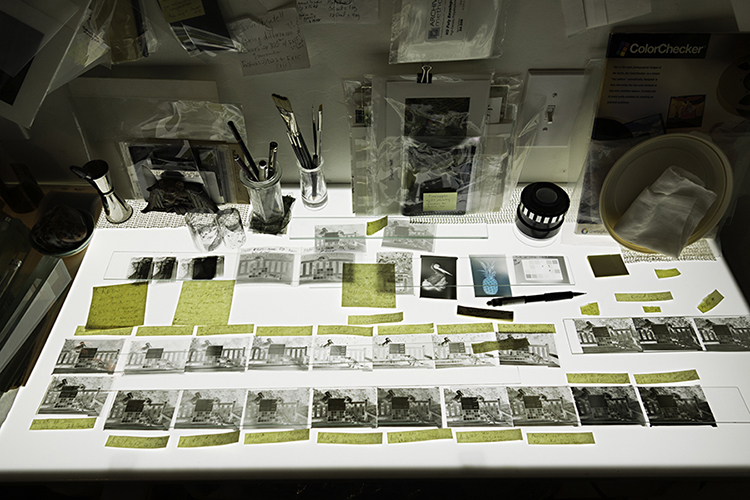
Somewhere along the line, as the negatives and/or prints and/or files start to add up, take everything — along with all the excellent notes you've been keeping—and spread out where you can see and compare. It's a terrific learning exercise. |
|
|
|
Continued... |
|
|