13. Dry Plate—Creative Control |
This recipe is my modification of "Kodak No. AJ-12." I chose it because it is both well-known and under-appreciated. As simple as it is (and we'll get to that on the next page) a plain silver BrI emulsion is very flexible. It will only take a couple of sessions to learn to make the emulsion, but far longer to learn its potential. Artistic potential and the freedom to commit to the mastery time required—without worry a material will be discontinued—is one the reasons to do all this. Therefore, creative control is where we're starting. A plain silver emulsion is by its nature very contrasty. It is clean (very low-to-no fog). It is essentially grainless. It is also slow. (Oh, so slow! Plus/minus ASA 1.) All these characteristics make it a very liberating emulsion. |
|
Why liberating? By necessity, it is a "tripod emulsion." There's no way around that fact, so you stop thinking about speed as some kind of Holy Grail. Rather than fixating on speed, you start thinking about the exposure/processing protocol that will deliver what you visualize. Deep shade or bright sun are equally good situations. You're never going to stop motion, so you embrace wind as part of the art. Because of the inherent characteristics of a If street photography is your thing, this emulsion will deliver streets populated by ghosts. Literally "street" photography. No worries about permission forms :-). Except for the addition of one more step and one additional ingredient, it is as easy to make as gaslight paper. You can have plates drying four hours or less from when you decide you want more plates. Or, you can break the process into four one-hour steps. With a reasonable time commitment before or after work during the week, you can have a set of plates ready every weekend. There are no ammonia fumes, as there are with almost all "fast" emulsion recipes; you don't need heavy duty ventilation. I always have film holders and 120 rolls loaded with this film, or its variation made with ammonium bromide (in the next set of lessons). Down To It In the lesson two pages back,"A Developer Segue," I gave the recipe for Defender 59-D developer. If you are planning on making it, you already have the ingredients for D23 developer. If you add borax to your chemical collection, you have all you need for the ultimate in easy control and flexibility. D23 can be used at stock strength or diluted up to 1:4. It can be used with water for a divided bath developing protocol. Borax, added to a low-metol D23 variation, makes a perfect accelerator for D23 or it can be used alone. All this from three ingredients that aren't expensive and keep forever if you want to buy them in bulk: metol, sodium sulfite, and borax. The recipes will be at the end of this page, but first, let's look at their use. The Darkroom Cookbook, any edition, by Steve Anchell, Focal Press, has a wealth of information on processing chemistry. I can't recommend strongly enough owning a copy. |

|
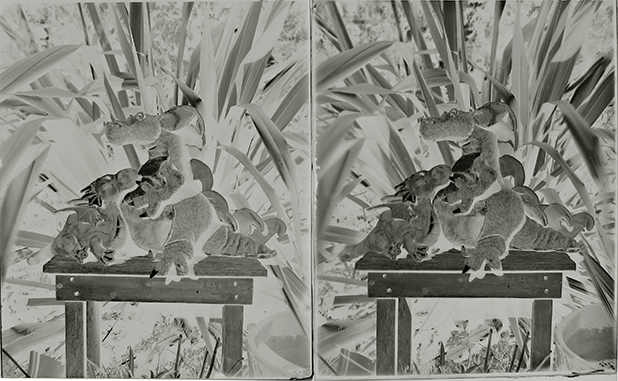
The 4"x 5" plate on the left was developed in Adox Adonal ("Rodinal") 1:10. The plate was exposed at f/16 and ½ second. The sun was bright but it was a low UV day (#1), late in the afternoon in mid-February. If the only thing important about the scene was the highlights it would be fine, but usually I want more than that from an image. The plate in the middle was exposed at f/11 and 1 second and developed in D23 and borax accelerator. More detail in the shadows with a slight decrease in the highlight density. The plate on the right was exposed at f/11 and 3 sec. It got 30 minutes in D23 at a 1:3 dilution, with agitation every 5 minutes or so. The plate prints perfectly but I think 30 minutes is a long time to hang over a developer tray. This is when you decide to embrace SLOW. When I first started making dry plates, I was unconsciously operating under the assumption (and burden!) that getting maximum speed is somehow important. Three seconds isn't fast enough to do any good, so why bother? Silly. Misguided, at the least. |
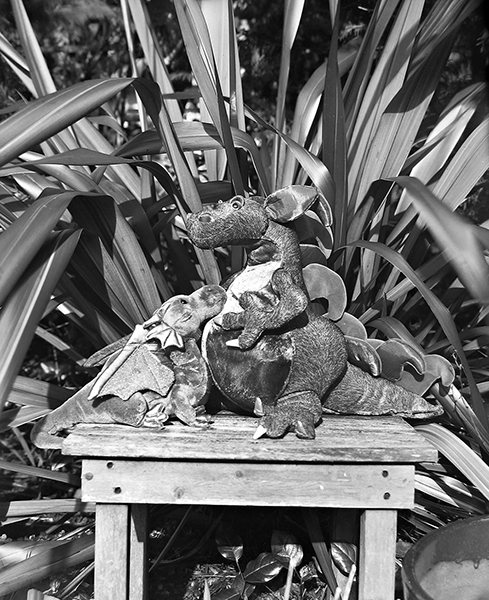
These plates were exposed at 15 seconds and 30 seconds at f/22. Both were developed by inspection, the same as the middle plate above, but with the D23 diluted 1:3, and a couple of 30 second dips in borax accelerator solution. Development only took 10 minutes. I used the plate on the left to make the prints comparing selenium toned to untoned gaslight paper prints. |
How you decide to develop is in part determined by the intended printing process. If you are enlarging on commercial multigrade paper you'll probably want a different negative than if you are contact printing on gaslight paper. If you want a digital output (screen or inkjet print), by far and away the easiest thing to do is to photograph the plate on a light table with a digital camera. Left: A print from a 4"x 5" plain silver BrI emulsion dry plate. The plate was photographed on a light table (emulsion side up) with a 10MP point & shoot camera. It was inverted in Photoshop. The plate required almost no correction. The emulsion is essentially grainless. |
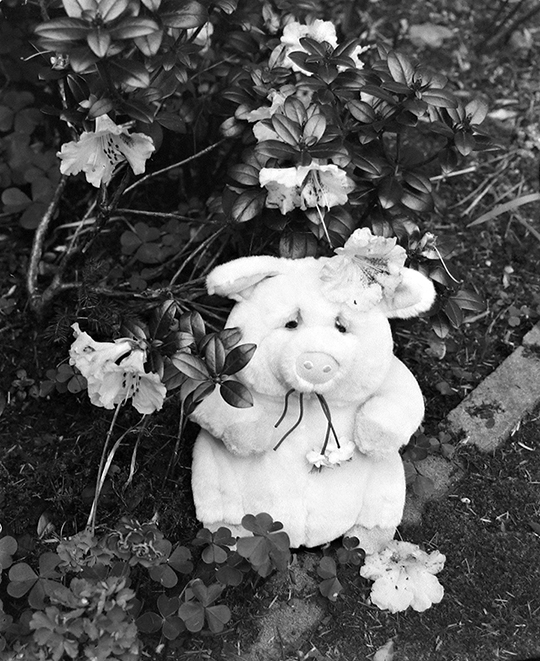
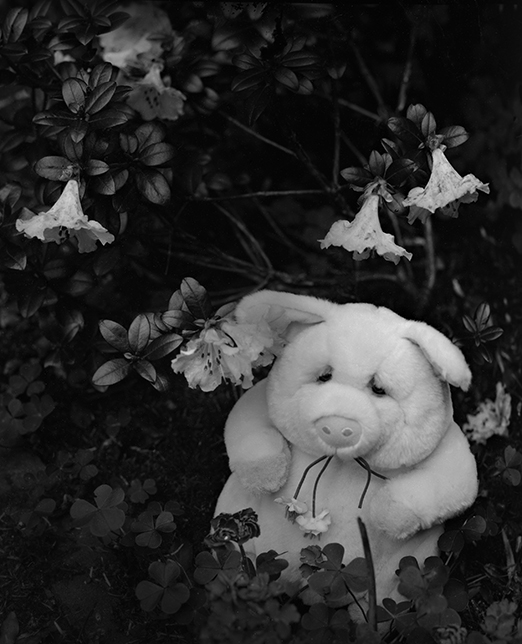
The Liberation of Embracing Shade Colorblind emulsions do a lovely job in the shade. They are inherently sensitive to blue light, so shadows, if given enough exposure, glow. The image at the top of this page is a flatbed-scanned negative (AJ-12 on Grafix Dura-lar Wet Media film.) I exposed at f/11 and 20 seconds, but this was in deep shade on a day that had just started to rain. I made that exposure and developed the negative while I waited for the rain to stop, and then re-posed the pig and exposed another negative (left for a full minute, followed by development in D23, 1:3, for 10 minutes. Whether or not all the extra detail is necessary, it's nice to know it can be gotten. |
|
|
|
Three Ingredients Developer Kit Metol, Sodium sulfite, and Borax 1) D23
Use at stock strength or diluted up to 1:4, either alone or in divided development with Borax-Accelerated D23 and/or plain water. The basic D23 recipe is very flexible. In addition to using it with various dilutions of stock strength, you can go as low as 75 g of sodium sulfite, and/or adjust the metol between 2 g and 7 g. |
|
2) Borax-Accelerated D23
Use at stock strength or diluted 1:1, either alone or in divided development with D23 and/or plain water. 3) Optional: 10% KBr Potassium bromide solution to control fog. Fog is essentially a non-issue with a plain silver emulsion, but 10% KBr is a nice to know about. TIPS: When working with handmade emulsions, a little care pays big dividends. Keep the working solution cool—between 65 and 68°F. Never grab plates by their edges from the time you first get them wet until they are completely dry. To move them in a tray, or from tray to tray, carefully slip your fingers under the glass and move them with your fingertips on the back side. Emulsion side is always up in the trays. If you find you have frilling problems, switch to a hardening fixer in your second fixing tray. Always fix completely. This means at least two additional minutes in the fixer past when you see the last of the the white, uncleared emulsion goes transparent. |