3. Getting Started—Heat |
|
As with most cooking, making silver gelatin emulsions requires heat. Happily for us, there are a lot of options for heat sources—from free to expensive, and from manual control to (nearly) automatic. Choosing a heat source involves financial decisions, of course. Also, seeing what's available. But, beyond those criteria, choosing a heat source or sources is the first step to personalizing our workflow. That's a big reason for starting simple and adding and changing equipment as you learn and go along. "Heat" is primarily about the waterbath. A waterbath allows you to hold an emulsion at a constant temperature for a long period of time without worrying about hot spots or quick temperature drops. Think about cooking a custard. The recipe may call for a double boiler pan. This is to keep the custard mix from direct contact with the stovetop and burning. Fogged (gray, low contrast) emulsion is the equivalent to burned custard. In addition, cooking with gelatin presents a second challenge. Melted gelatin changes viscosity (how thin or thick it is) with changing temperature. When it comes time to coat the emulsion, viscosity is an important variable. You want to standardize on a temperature that works for you and stick with it from start of coating to finish. Let's look at a number of options, starting with the simplest. The thermos holds ice water. The hotpot boils water in a minute. The emulsion is made up in a one-cup/250 ml Pyrex measuring cup. That cup rests snuggly in a 2-cup/500 ml Pyrex. They in turn sit in a double nest of big bowls. If you start with the temperature you want in all the containers, it is a trivial effort to keep the emulsion at a constant temperature for a long period of time. All it takes is refreshing the water in the outside bowl. That's mostly a matter of replacing cooling water with hot water, but having cold water available is handy for the occasional overshoot. 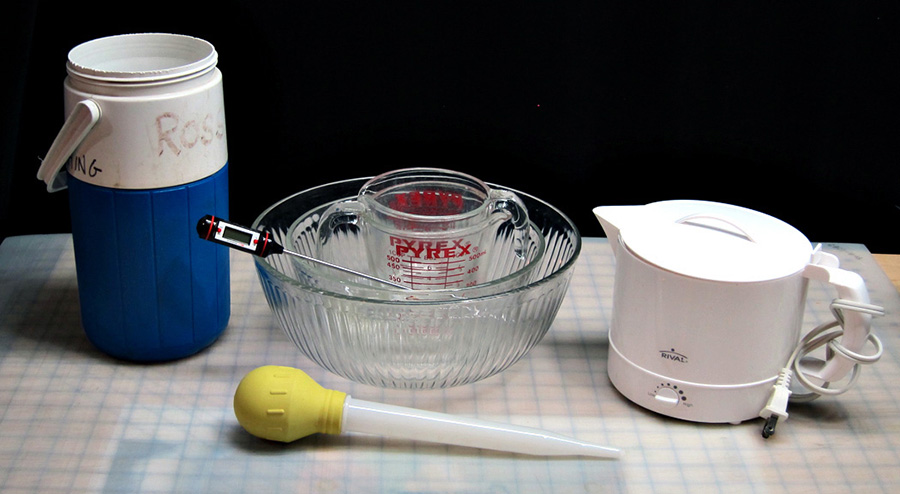
|
|
A heating unit can cut down on the minute-to-minute monitoring of the waterbath temperature. You will be able to leave the emulsion unattended for up to 5 minutes at a time—and longer once you know how your equipment behaves. Note the embedded cautionary tale. You will still need to regularly check the temperature of the waterbath and be prepared to make adjustments. Some heating units are more reliable than others. |
|
|
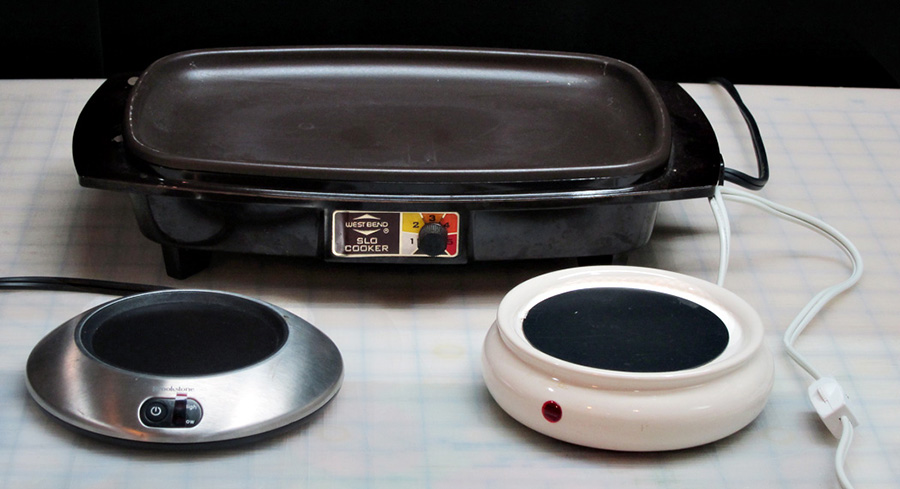
Above, back: The bottom of a slow cooker. I used it for the first three years I was making emulsions. I put a layer of marble tiles on the surface. The tiles worked wonders for buffering temperature swings. The only reason I stopped using the unit is because the cord was getting frayed. Above, front right: A gadget for keeping scented candles melted. It heats and holds to about 55°C, a higher temperature than most emulsions like, so if you used this, you'd mostly by adding cold water to your waterbath. If your work area tends to be cold, something like it might be a good way for you to go. Here is where I remind you to think about your own unique circumstances. Nothing about this business is one-size-fits-all. Above, front left: Love this thing. It's a Brookstone brand coffee mug warmer. It has two temperatures, ~40°C and ~50°C. Turns out that those are the two temperatures most commonly encountered in emulsion making. I will be demonstrating the first recipe using it as the heat source. 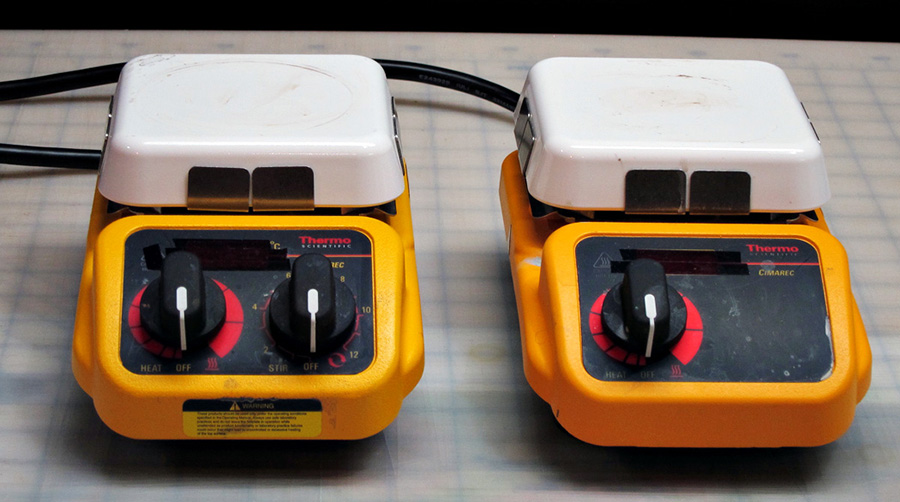
|
|
Of course, there are any number of commercial options for professional lab equipment. Above are two siblings. On the right is a hot plate. It is thermostatically controlled and easy to use. You still would need to babysit your waterbath, but not nearly as often. The unit on the left is the same hot plate, but with the addition of magnetic stirring. If you decide to go on to advanced emulsion making, you will want to get one. It also comes in very handy for making our own processing chemistry. But, I don't recommend it in the beginning. 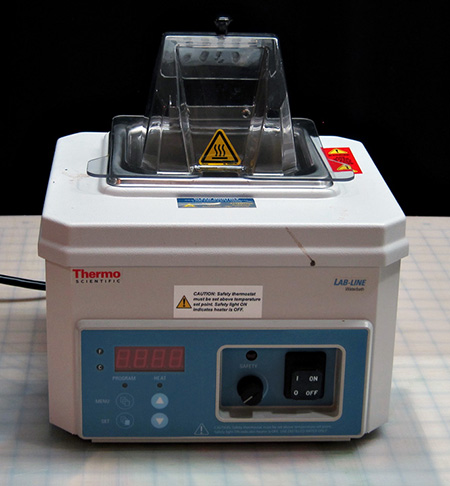
And, last but not least, an indulgent luxury: a thermostatically-controlled waterbath. Set the temperature and walk away until the emulsion is done ripening. It has freed up my time enormously and I love it, but as you can probably guess, I don't recommend it in the beginning. Less so, in fact, than any other piece of equipment. I knew what I was doing (mostly!) and how emulsion making worked before I put part of the process on autopilot. The only way to really learn this stuff is to fully engage hands and brain in the beginning. |
|
|