17. Ammonium Bromide Plain Silver Negative Emulsion, part 3 |
|
At some point, if not already, you'll probably want to start designing your own emulsion recipes. Some new recipes will be simple tweaks to old classics. Others will be more original. Either way, only the most basic chemistry is required and halides are a good place to start. If you crunched the numbers yourself on AJ-12, you came up with 4 g of KBr and 5 g of silver nitrate, yet my modification calls for 5 g of each. Very early in my emulsion making endeavors I decided that I was happier with emulsions that used a bit more potassium bromide than most of the published recipes called for. I settled on equal grams of KBr and AgN03. I haven't gone wrong yet taking that approach as a baseline. The recipes have worked well, and they are easy to remember and easy to compare one to another. But, it is important to note that as with most "things emulsion" there is a whole lot of creative wiggle room. If your high school chemistry is rusty (or non-existent) let me start at the beginning. A gram is a gram, but a gram of a potassium bromide is not the same as a gram of silver nitrate when it comes to mixing them together. Chemicals, both as pure elements and as compounds with other elements, have different atomic and molecular weights (or mass). This is where the "Periodic Table of Elements" comes in. You can dig in as deeply as you want on the internet or a chemistry book, but for us, for now, it is enough to understand that you can't just substitute 5 g of ammonium bromide for 5 g of potassium bromide. Take a minute to read the following two excerpts and then meet me below. |
|
|
|
From Baker's Photographic Emulsion Technique, 1941. 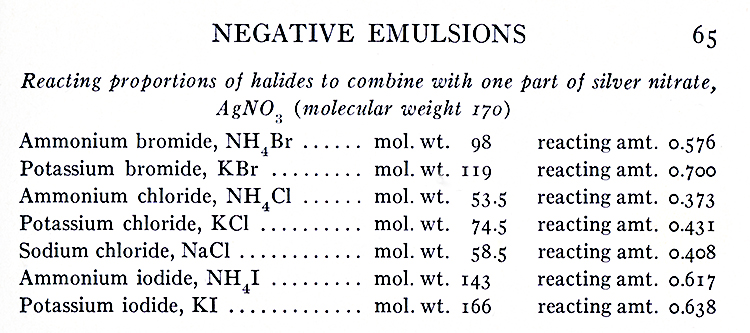
|
|
|
|
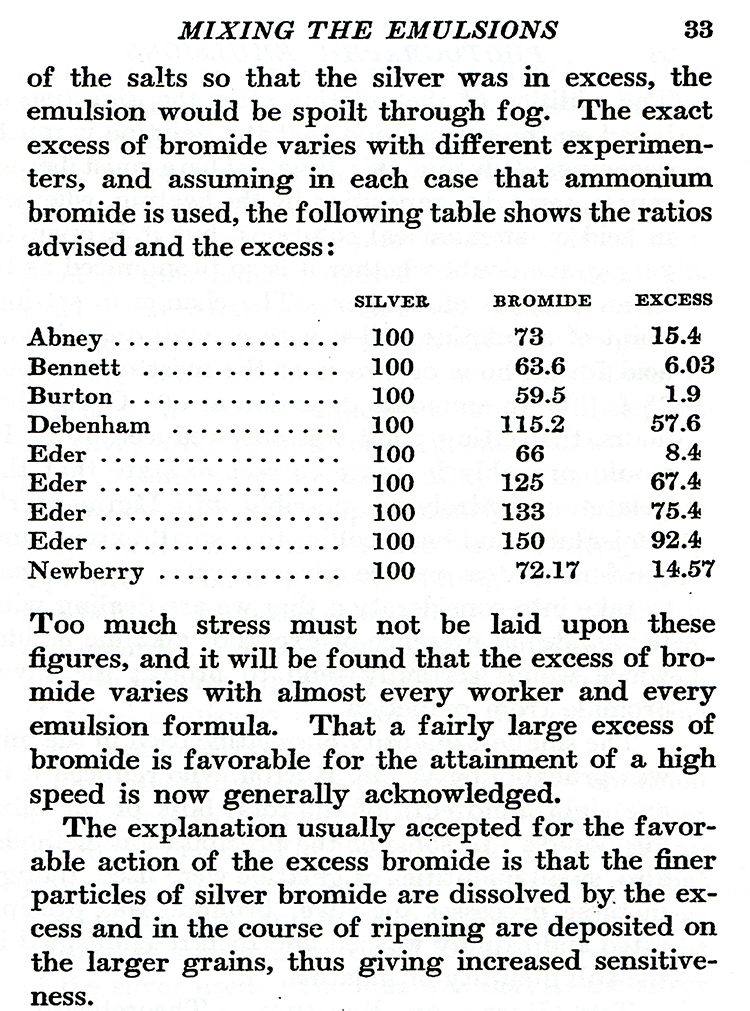
From Photographic Emulsions: Their Preparation and Coating on Glass, Celluloid and Paper, Experimentally, and on a Large Scale, by E.J. Wall, 1929. |

|
|
Now, hopefully your eyes didn't glaze and you noticed a couple of interesting things. When Baker says "reacting proportions" he means the same thing as Wall's "equivalent weights." In the Baker chart, if you divide the molecular weight of KBr by the molecular weight of silver nitrate, you come up with 0.7. That means that it only takes 0.7 g of KBr to react completely with 1 g of AgNO3. In the original AJ-12 recipe, that would have meant that for 40 g of silver nitrate, you'd only need 28 g of KBr. Yet the recipe calls for 32 g. Wall explained the "why" of that nicely. I also appreciate his non-dogmatic approach to the art and science of emulsion making. Many excellent emulsion makers and researchers had (and have) many different approaches. Something that might not be obvious from Wall's chart is how he arrived at the "excess" line of the table. If you look at the Abney numbers, you see that 15.4 is not the difference between 100 and 73. But, if you multiply 100 x 0.576, you get 57.6. When you subtract 57.6 from 73, you arrive at the 15.4. When I modified my modification of AJ-12 to make an ammonium bromide plain silver emulsion, I started from 5 g of KBr and applied the ratio of the reacting proportions. 0.576 divided by 0.7 is 0.082. That number multiplied by 5 (grams of KBr) gave me the 4.1 grams of ammonium bromide. If I wanted, I could round down to 4 g because of the wiggle room I give myself for excess bromide. If the AmBr/KBr ratio is applied to the original AJ-12 recipe, the AmBr amount is 3.3 g. That could be considered the lower end of safety for excess bromide. |
|
|
|
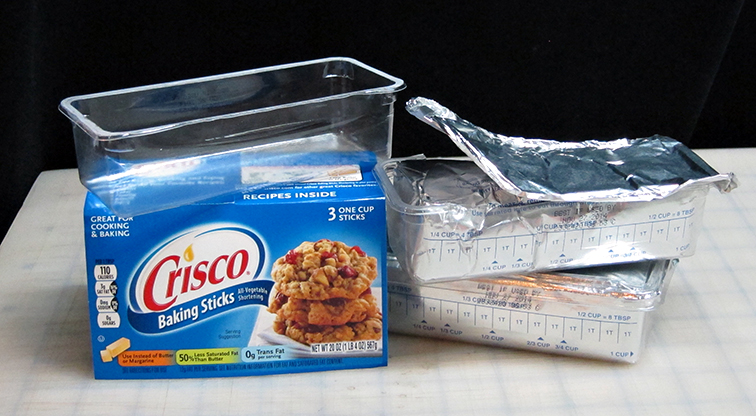
Emulsion Coating Wells from the Grocery Store [October 2018 update: For when you'd like to try something fun! This works well, but in the beginning, I still recommend coating with guide bars.] How could I have walked down the baking aisle of my grocery store so many times and never seen the emulsion wells for sale until a month ago? I even bought a set last Christmas and then recycled them. Crisco shortening sticks in their own soft plastic tubs (or rather, emulsion wells). |
|
|
|
They are the same width as 5 inch puddle pushers. The soft plastic is strong, but not brittle. There is a lip all around the top. If you hold the handle of the Puddle Pusher up to it and mark each end, you can cut out a snug guide/holder for the coating rod. 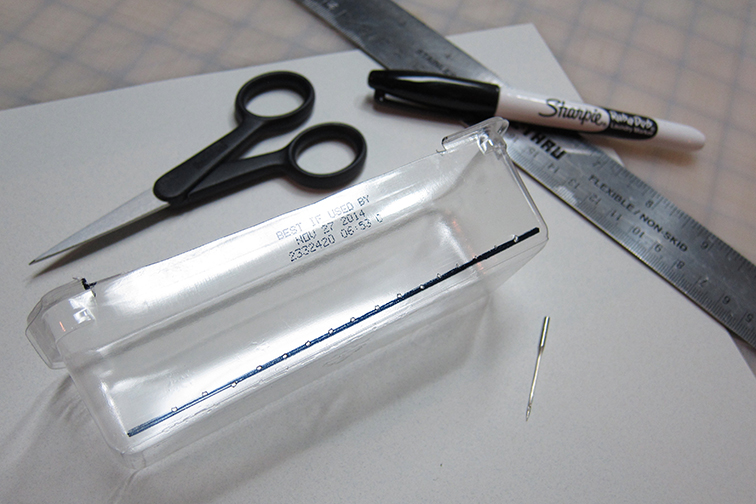
|
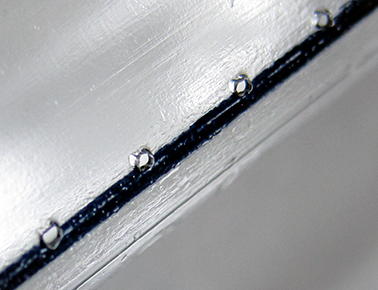
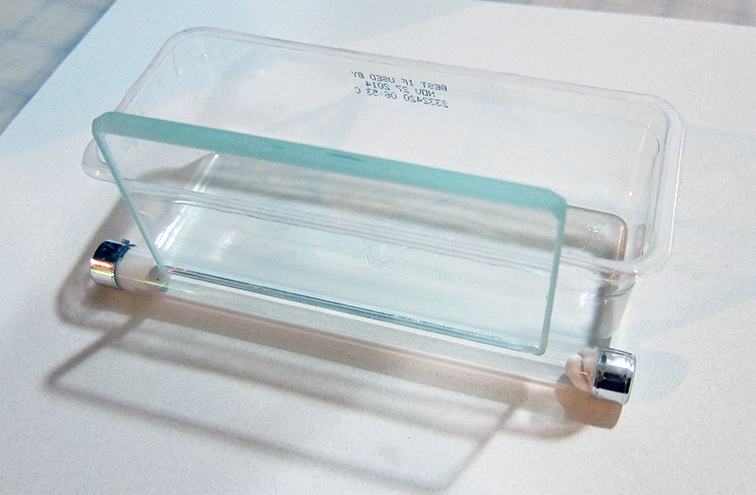
To let out the emulsion in front of the glass rod, punch small holes along a bottom long edge. In the picture above, you are looking at the tub lying on its side. The black line and the holes are about a ¼ inch up the side from the bottom of the tub. This is to make sure the holes are up high enough that the burs from the holes can't scratch the film. Punch from the inside out. The holes need to be the right size. It will take some experimentation to get things right, but fortunately the experimentation is very cheap, and it's a great excuse to bake a batch of cookies. |
|
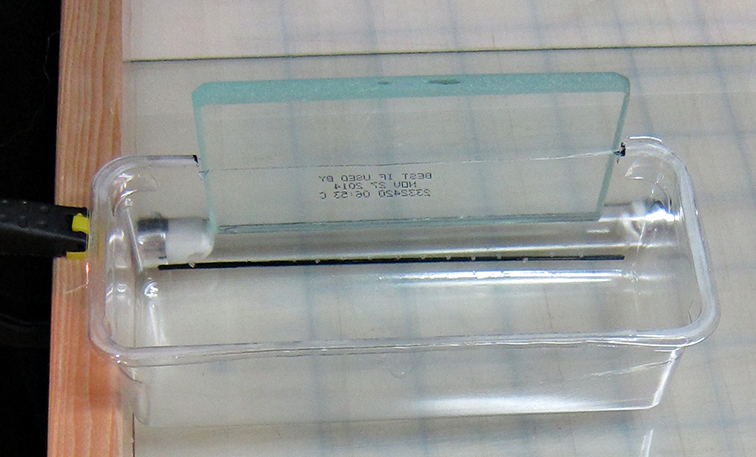
A real advantage to the Crisco tubs is that you can fill them while tipping them away from the holes. Position the puddle pusher and then tip the tub toward the holes, while starting to pull the assembly along the film. The only thing to really watch out for is that your emulsion doesn't cool down so much that it stops flowing through the holes. |
|
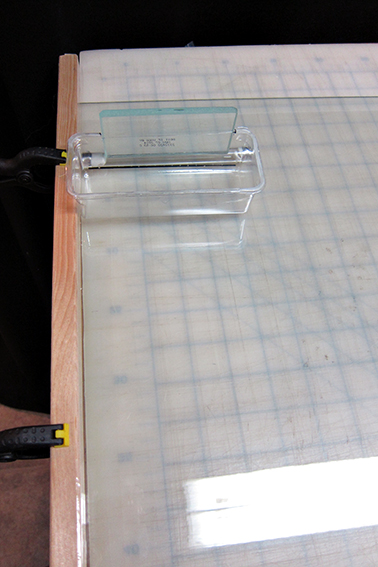
Coating Long Strips of Emulsion. Clamp a guide bar to a glass sheet coating surface. Depending on your arrangement, the clamps will be along an edge or at the top and bottom. The clamps have to be off the table that holds the glass sheet or you won't be able to have things dead flat. Position the well and puddle pusher at the head of the sheet. Pour the "right amount" of emulsion in and make sure the puddle pusher is contacting the film as you immediately and smoothly pull the emulsion down the track. If you don't want to make Crisco tub emulsion wells, you can arrange two square wood dowels, set apart the width of your puddle pusher, plus about a half inch. Pour emulsion in a pool at the top of the sheet between the dowels and immediately and smoothly pull the emulsion down the track with the puddle pusher (prepared with tape and putty, as always). A little emulsion seeps under the dowels, but the system works better than you might imagine. The pull goes more smoothly if you cover the wood with plastic tape. I like Scotch brand MultiTask tape. The dried strip of emulsion will be about 5 inches wide. The length is up to you. My arms are long enough to coat about 32 inches (although it took a bit of practice to make strips that look good the whole length, and I still have some really epic fails). This is wide enough for two rolls of 120 film, or two Baby Graphic negatives. Also, 4x5 film, and 5x7 film. Or, a panoramic strip through a larger format. In my experience, a sharp rotary paper cutter works better than a guillotine-style cutter for clean, precision sheet film cutting. Always wear clean cotton gloves when cutting and loading film. |
|
|