18. Film, part 4 |
|
|
|
DEVELOPING HANDMADE ROLL FILM |
|
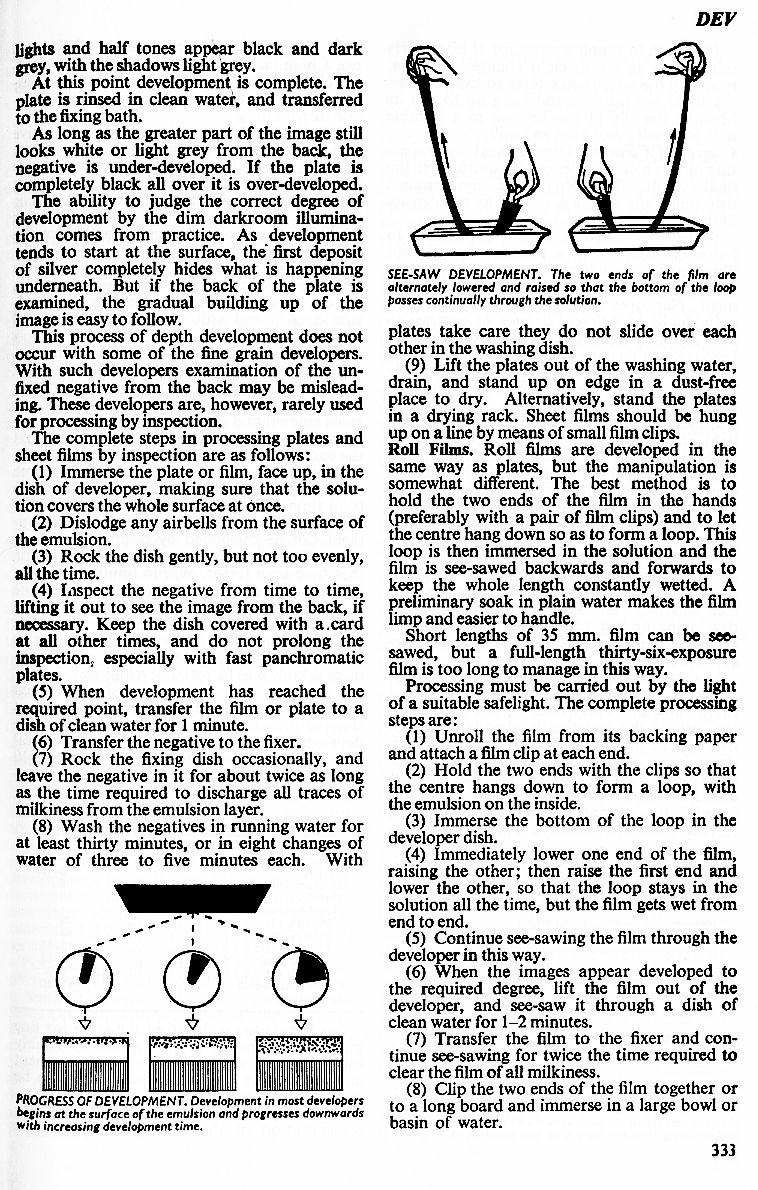
Handmade film has many outstanding virtues, but "tough" is not among them. The emulsion, once wet, is fragile. I've never tried, but I don't think it would stand up to reel development. Fortunately, there are alternatives—either tray development or "See-Saw" development. For those of us who have often cursed the process of getting film on a reel in total darkness, both alternatives are a delight. From 'The Focal Encyclopedia of Photography', 1960 edition. |

|
|
|
|
The See-Saw technique works just fine. It also has the advantage of being very economical with developer. A small Rubbermaid food container is a perfect tray. Having said that, I personally prefer tray development—or more precisely, trough development. |

|
|
Since there is no reason to waste developer, a tray/trough that fits the film format as closely as possible is a very good thing. Both wallpaper trays and vinyl gutters are made for the job. Vinyl gutter material has the advantage of being customizable. You just cut them to length and close the ends with self-gasketing end caps. The only disadvantage is a bit of labor to make them. Their advantage is that an entire roll of 120 film, with clips, can lie in the bottom. The white color makes seeing development progress very easy. A disadvantage is that when they are full of liquid they can twist when you try to pick them up. The black tray is Sherwin-Williams' brand. They are very inexpensive and the black color makes it easy to see the film clear in the fixer. The white trays are from Lowe's Home Improvement and they are a good size for 127 film. I bought my wallpaper trays a couple of years ago. Today, I do most of my developing in vinyl gutters. Merchandise in stores changes constantly. What is here today may not be available tomorrow. (Although I think gutters are with us forever—at least on the Oregon Coast!) Determine how long your film plus clips will be and then take a tape measure on a shopping trip. Just as with tray development of sheet film, you will want a tray for each processing chemical and at least two for washing. Below is a roll of 127 film in the wash tray. The other three trays are developer, stop (plain water), fix. You could add a second fix bath if you wish. The film was exposed in a Beacon 127 half-frame camera. Note the film clips on both ends. 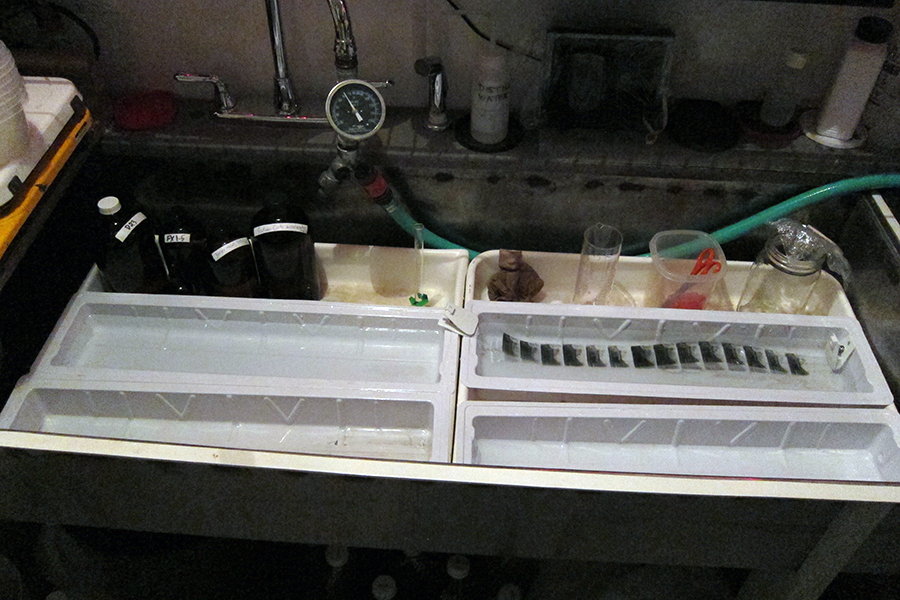
|

If you standardize which side of your film clips you attach emulsion-side, you'll always be able to guarantee that you are processing emulsion-side up. When the film is dry it cups to the emulsion side, but when it is wet, it flattens out and it can be very hard to know which side should be up. When you have finished washing, take a clip in each hand and see-saw the film through a small tray of Photo-flo or similar. Hang the film to dry completely before you touch it again. If you are hanging from a hook on the wall, have the emulsion side toward the wall. That will cut down a bit on dust. I have never gotten around to investing in a dedicated film drying cabinet, but they are nice if you have one. TIP: Wet film has a nearly irresistible attraction for walls. If you are hanging film to dry from a hook or nail in the wall, have it far enough away from the wall that the film doesn't end up on the wall! |
|
|