Digital Negatives |
|
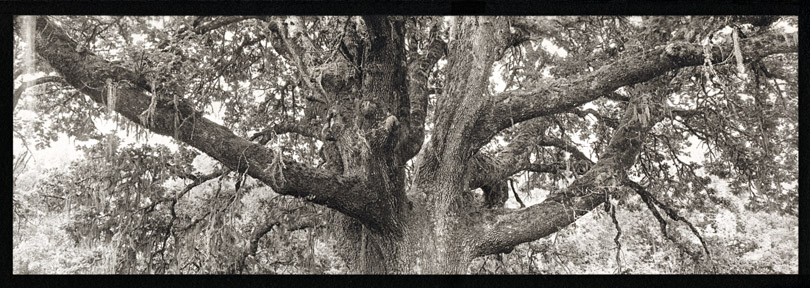
| 'Oak Ent' |
|
The definition of 'digital negative', as used here, is an inkjet-printed facsimile of the traditional film negative, usually larger than the original source. The file used to create the digi-neg can come from scanned film or from a digital camera image file. The situation can get confusing because the digital image file is often a DNG (Digital Negative), the publicly available archival format for the raw files generated by digital cameras. The overlapping definitions may cause confusion, but the inkjet negative itself couldn't be a simpler thing. I can't claim any special tricks for making digital negatives. Through trial and error I've developed a system that works for me, but I still don't rely on 'one perfect workflow' for all my printing. I'm not particularly interested in canned profiles or any one-size-fits-all technique. Most of my work is limited to Curves and selective use of the Burning and Dodging tools in Photoshop (CS2). Some images work with a single negative and for others I use a form of old-fashioned unsharp masking / contrast control masking by registering two layers: the negative and its low density, low contrast positive (printed so that the printing lines of the two layers run perpendicular to each other.) As with all things artistic, there are many ways to express a vision, but if you are uncomfortable with devising your own strategy there are a number of published systems for making great negatives. (Update 10/22/09: I have added a significant new section to the Silvergum pages, here The information expands the use of digital negatives to include color separation negatives for gum printing.) The important thing is that handmade paper is a wonderful substrate for enlarged negatives made with an inkjet printer. Currently, I use an Epson R2400 with matte black ink on Pictorico OHP film, printed at 720 d.p.i. Below are several comparison examples. An unfortunate fact of scanning textured paper comes into play here. In life, the blacks on the paper are deep and glossy. When scanned, the light hits the microscopic hills and valleys of emulsion-covered paper fibers and the result looks rough and matte. I ask you take my word that there is little visible difference in the appearance between the prints on watercolor paper and the prints made on commercial paper except that emulsion on hot press-surfaced watercolor paper has a depth and dimensionality that makes a baryta surface seem a bit lacking for something. |
|
Digital Negative with Handmade and Commercial Paper
|
 |
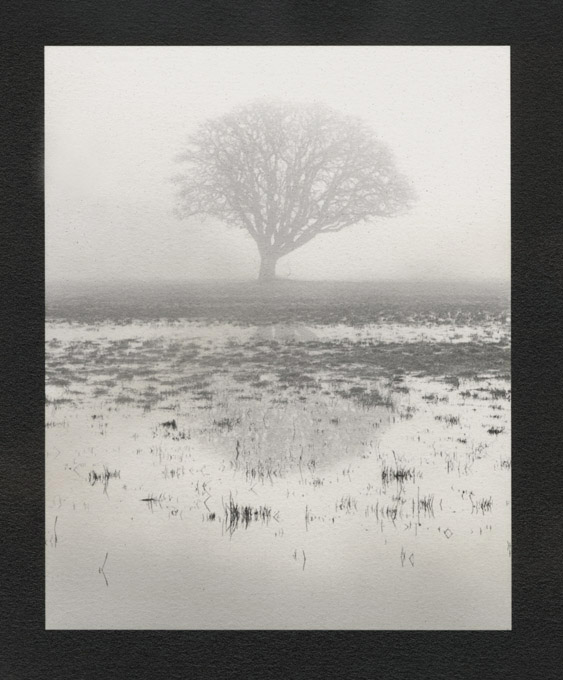
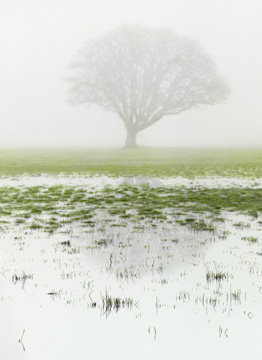
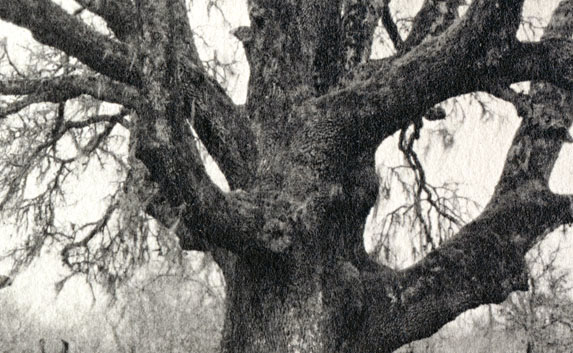
Digital negative on emulsion-coated Fabriano Extra White HP ('Hot Press', i.e. smooth) watercolor paper. (120 film, 6 x 17 cm negatives scanned at 4000dpi with a Nikon ED 9000.) |
 |
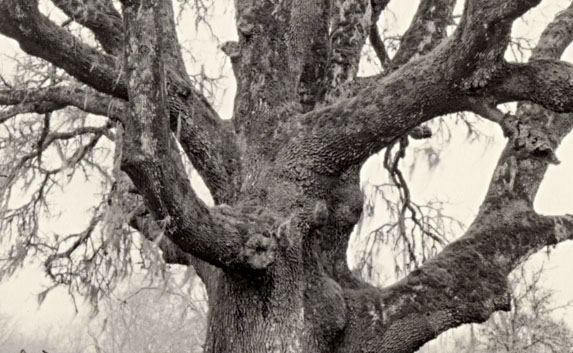
Digital negative on Ilford Multigrade IV FB glossy. The difference between the actual prints is very slight. |
|
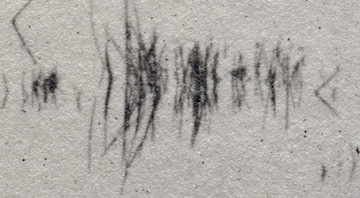
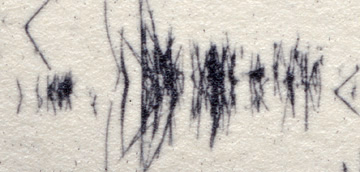
Digital Negative on Handmade Paper: Close-up
|
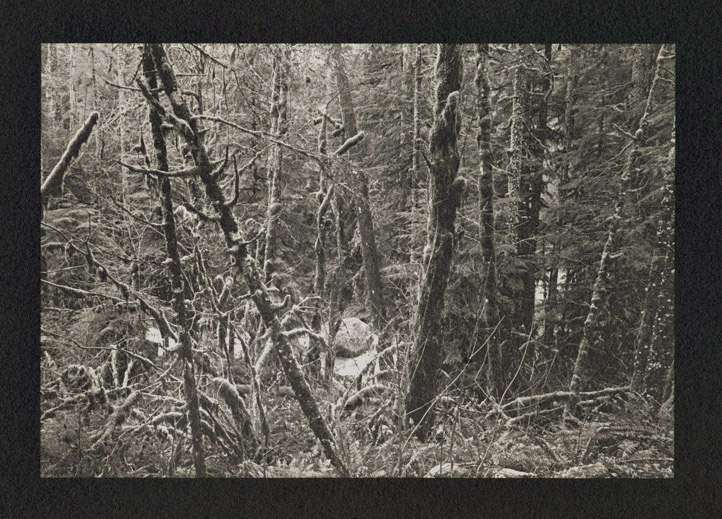 |
Along Hwy 20 in the Oregon Cascades. Image size 4.75 x 7 inches. Camera: Fuji 69 rangefinder w/ 65mm lens Digital negative: double layer/sheet technique similar to traditional unsharp and contrast control masking. Original negative: 120 TMax 100 developed in XTOL. Fabriano paper. |
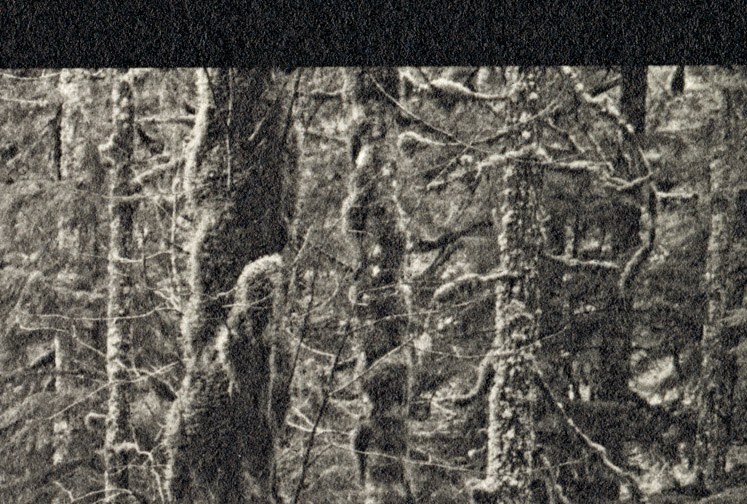 |
500% crop of above image (1.4 x 2 inch section) |
|
Film Negative with Handmade and Commercial Paper
|
 |
5x7 film (TriX 400) negative contact printed on emulsion-coated Fabriano HP. |
 |
5x7 film negative contact printed on Ilford Multigrade IV FB glossy. There is essentially no image quality difference between the prints from digital negatives and from film negatives. The difference in color between the two prints of trees is accurate. I used the prints to test different toner strengths. |
|
Apples and Apples
|
| The following two prints are as close to an "apples & apples" comparison as I know how to make. The first print (left) is a 5x7 film negative contact printed on emulsion and Fabriano. The negative was made with a 150mm lens. | |||||||
 |
|
||||||
|
|
||||||
|
Digitally Merged Panoramas
|
 |
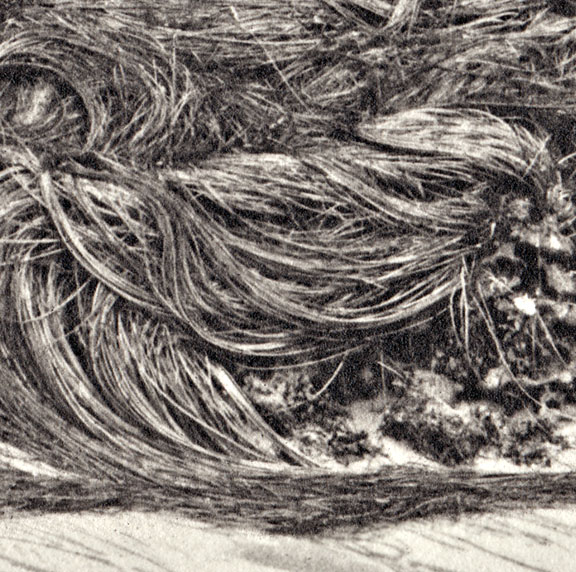 |
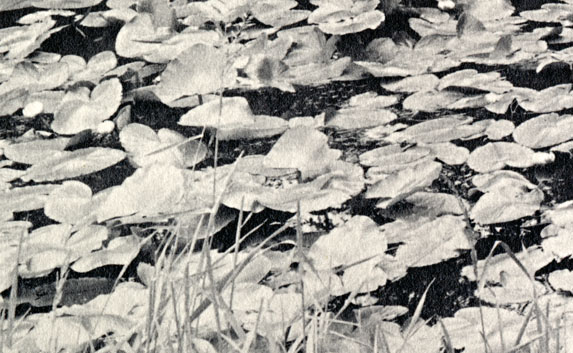
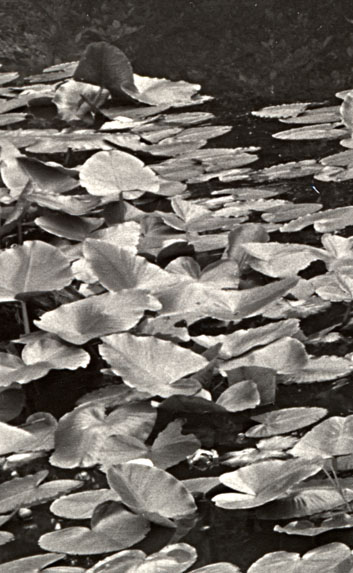
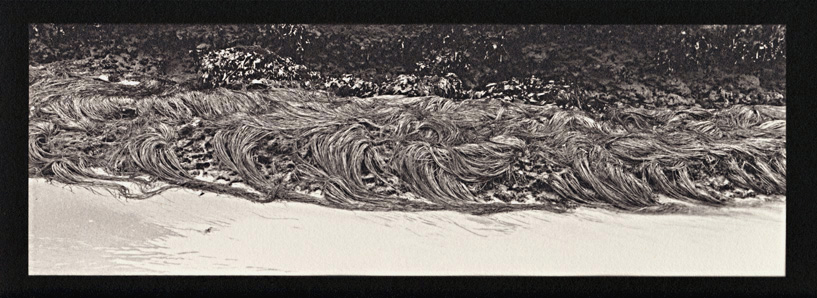
'Seaweed' The negative for this image was made in Photoshop CS2 with the Photomerge plug-in from a 6x17cm negative (120 film) scanned in two sections on a Nikon 9000 ED. The crop is a 10x enlargement of a 1.5 square inch section. |
|
Replace This Text in js
Replace This Text in js
|
Copyright © The Light Farm |