The Basics
"TLF#2" works very well. It has been remarkably consistent over the course of many makes of the emulsion. Six identical runs is my personal benchmark for knowing the recipe is sound (enough) and believing that I have the kinks worked out of my personal workflow. If this recipe is followed as closely as possible, it will closely behave for anyone else the way it behaves for me. And, far more important, with consistent work practices an emulsion maker will be able to make nearly identical consecutive emulsions, i.e. what you take out in the field from one time to the next will be predictable.
One last observation: Although I will be trying to spell out in obsessive, tedious detail my workflow on this recipe (because I can 'guarantee' the results), and although I obviously think I've developed a good procedure, as far as equipment goes there are many options for substitution. When all is said and done, it is consistency and care in use that will deliver the goods, not the precise gear. Note that this does not hold true for the chemicals. Precise measurements — along with careful time and temperature control are essential.
I suggest that you first read this page, then the recipe, and then this page again. After that, it's just a matter of going at it. What might seem complex now will seem like elementary school after a couple of emulsion making sessions. That's a promise.
CHEMICALS:
Distilled water
250 Bloom Photographic Gelatin (from Photographers' Formulary)
Knox food gelatin
Potassium bromide
Potassium iodide
Silver nitrate
Ammonium hydroxide, concentrated, 28 or 29%
Gold chloride, 1% solution, 10 ml (from Photographers' Formulary)
Ammonium thiocyanate
'Everclear' grain alcohol
Crushed ice, full bag +/-
EQUIPMENT:
Beakers or similar (at least two each of approx. 25 ml, 50 ml, 250 ml, and 400 ml)
Weighing scale good to 0.1 g accuracy
Thermometers (three)
Countdown timer
Stopcock buret or equivalent (thin neck mini funnel or monoject syringe)
Magnetic stirring plate with stirring bar to fit the bottom of a 250 ml beaker
Heat sources, 2, for waterbaths (one to hold a 250 ml beaker and one for a 400 ml beaker)
Pyrex (or similar) glass bowls with tight-fitting plastic lids (2, approx. pint size and quart size
Plastic picnic-style spoons
Amber dropper bottles, 30 ml and 125 ml
Stainless steel spatula
Graduated cylinders, 25 ml and 100 ml
Lightproof container to refrigerate emulsion and washed noodles
Potato ricer, stainless steel
Cotton jelly straining bags (2, one for backup)
Wide mouth canning funnel, plastic or stainless steel
Rubber or silicone scraper(s)
Cold beverage thermos jugs, 2, approx. 1/2 gallon and 2 gallon
Terrycloth bath towel (stored in a plastic bag in the freezer)
Gold mesh coffee filter(s), good quality and as fine a mesh as possible
Ziploc-style plastic sandwich bags
Plastic wrap and rubber bands
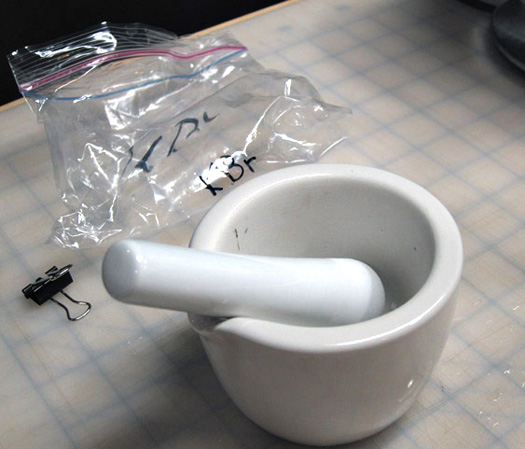
Ceramic mortar and pestle for grinding KBr
Red LED light bulband/or string of LED mini-lights
Eye protection and gloves (latex, or preferably nitrile)
Exhaust ventilation in a reasonably clean darkroom or dark'able space
And, everything necessary to coat plates: (Nearly) Foolproof Plate Coating.
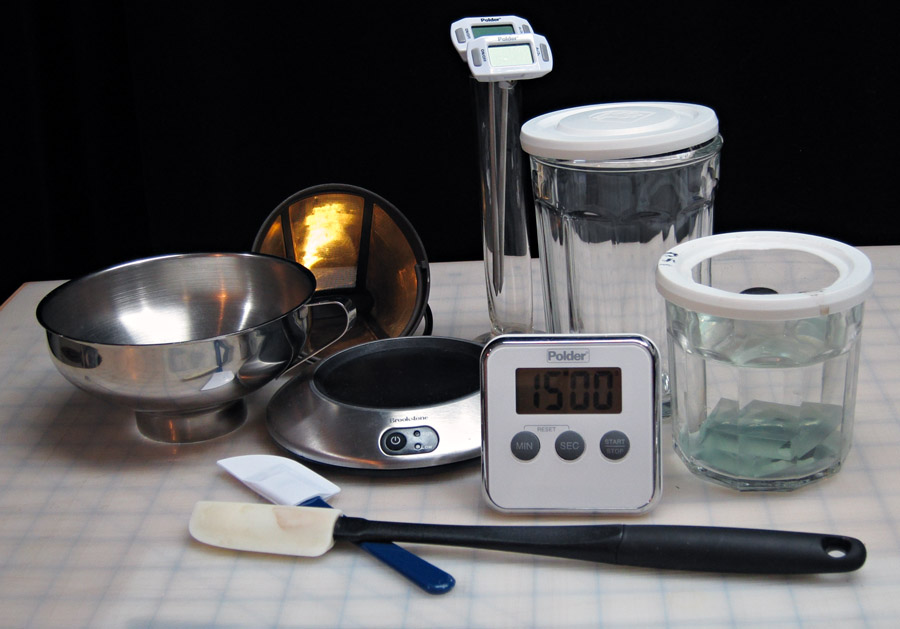
It's lucky and fun that so many emulsion making tools can be found at kitchen supply stores. I have a good supply of beakers, but I also rely completely on Luminarc drinkware (what they call a 'working glass', both 14 oz and 21 oz sizes, with lids.)
Brookstone brand makes an excellent 2-temperature coffee mug warmer. The two temperature settings come very close to matching the temperature requirements for "TLF#2". A jug of ice water and a thermos of hot water standing ready are all that's needed to keep a very consistent waterbath temperature.
An inexpensive ceramic mortar and pestle is invaluble for grinding KBr 'rocks' into a powder fine enough to dissolve readily. I keep one dedicated to only KBr in a labled plastic bag.
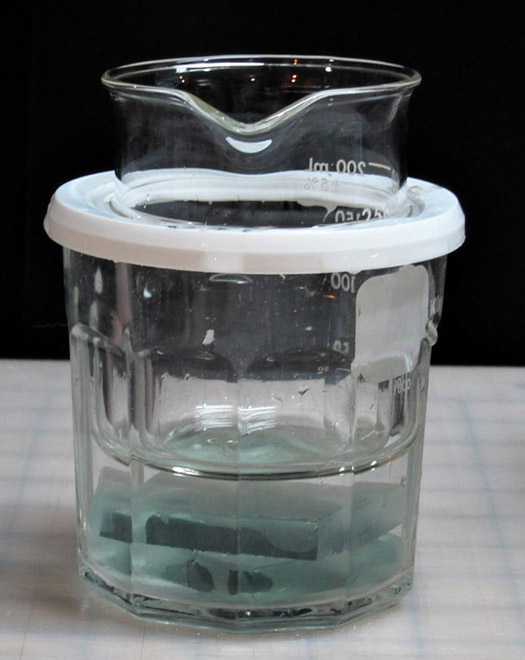
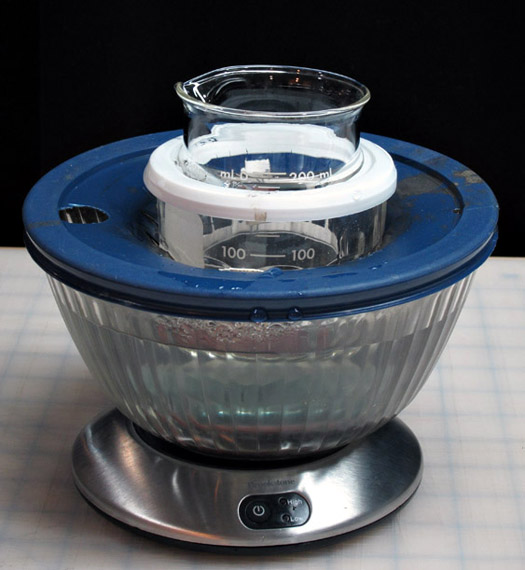
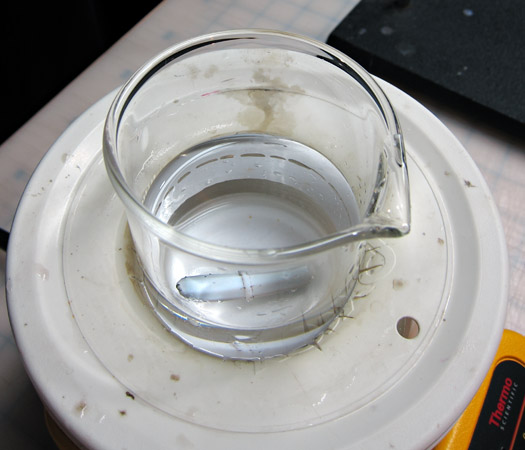
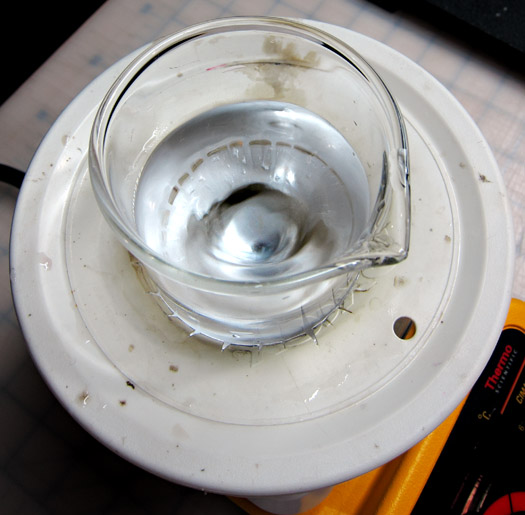
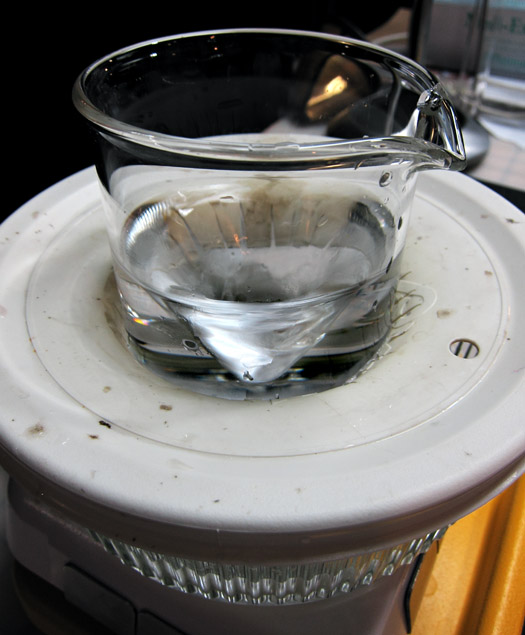
Waterbaths are key to success. Fortunately, there are many options to, as they say, "fit all budgets". Luminarc working glasses and Corning Pyrex lidded bowls are ideal. The reason for a waterbath is to maintain the emulsion at as constant a temperature as possible throughout the ripening/digestion steps. Notice that in all my waterbath setups there is something to hold the beaker or jar of emulsion away from the heat source, safely surrounded by water. The beaker in the working glass to the left sits on pieces of thick glass. There are emulsion recipes that call for constant agitation during ripening. This makes the space separation less important, but in recipes that call for periods of still ripening — as "TLF#2" — it is important to maintain an emulsion/heat source distance.
Another requirement is that everything fits tight enough to hold down and together while sitting in the water. I have cut individual lids to fit the various size beakers and glasses I routinely use.
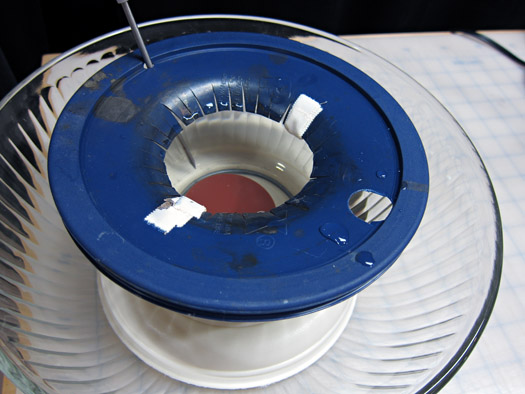
On a plastic lid, trace around the bottom of a beaker and then cut out a hole a little smaller than the circle. Cut 'fins' around the edge. The hole should be tight enough that the beaker won't float up and out of the waterbath. Punch one hole for a thermometer and another larger hole big enough for a syringe or a turkey baster for easy removal and addition of water for temperature control.
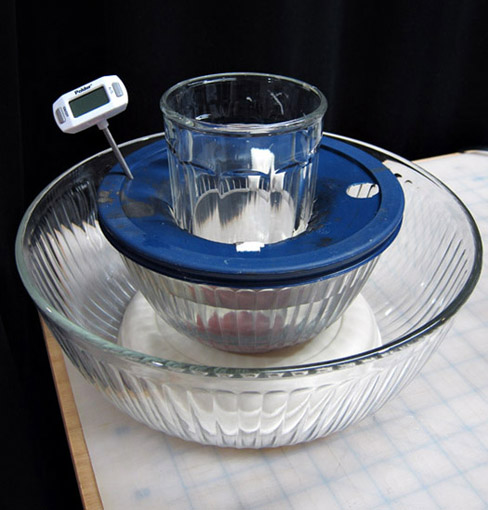
A heat source is a convenience, but not a necessity. You can nest the emulsion waterbath inside a larger waterbath. The temperature will stay stable throughout riping with only a little babysitting. (The lid for the largest bowl will also need to have an appropriately-sized hole cut.)
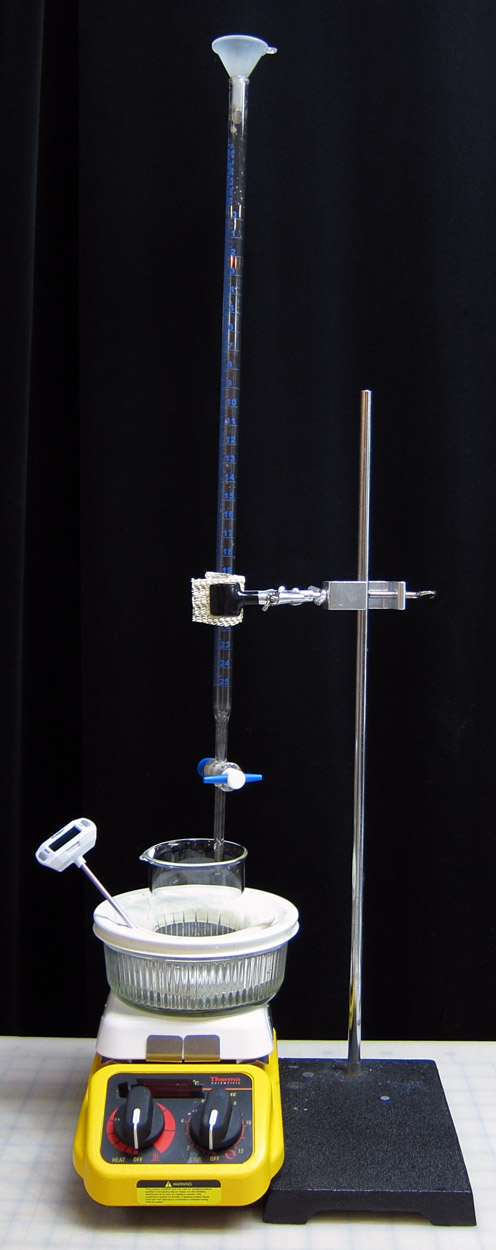
A purchase I would undo if I could is my heated magnetic stirring plate —an unnecessary expense (in my opinion, for my purposes.) For the same money, I could have bought a magnetic stirrer without heat and two lab hot plates — for much more flexiblity. The protocol I've ended up on is to stir the emulsion in the beaker and then set it in a waterbath held separately on a hot plate. It's a little fiddley (but not much) and it gives me perfect control of the process.
I favor a stopcock buret for silver additions. They aren't expensive, and the addition rate is identical from one time to the next. Also, a double-run emulsion attempt is on my schedule for 2012, and all I'll have to do is add another clamp and buret. (Note: Make sure to run clean water through the buret asap after use. Silver nitrate solution dried in the tip can ruin it.)
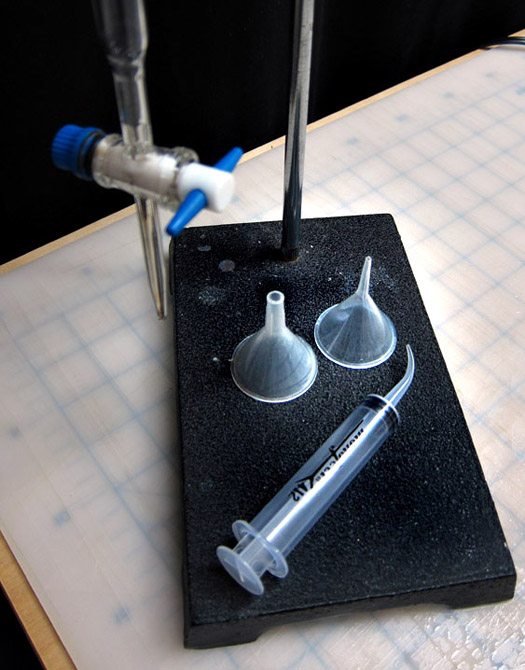
Having said that, silver addition is very easy and there are a number of options. You can pour through small funnels (the addition rate determined by the funnel neck size) or you can add with a syringe.
The only thing to bear in mind is that addition rate is an emulsion variable. Whatever the exact method, just try to be consistent.
A magnetic stir bar in the bottom of a beaker will form a vortex in the liquid — small-to-vigorous, depending on the speed the bar spins. You want a 'good' vortex, but not one that splashes about making a fuss. That's the best I can do with words. Some playing in the light with a beaker of water will make it all clear.
I use magnetic stirring only for the precipitation step (step one.) For step three (digestion), I put the chilled noodles directly in a 21-oz working glass (with the aid of a wide-mouth canning funnel.) The glass sits in a waterbath. After that, I do all the stirring required for the step with a plastic spoon. The spoon can stay in the emulsion throughout the digestion time, with the snap-on plastic lid in place between stirrings.
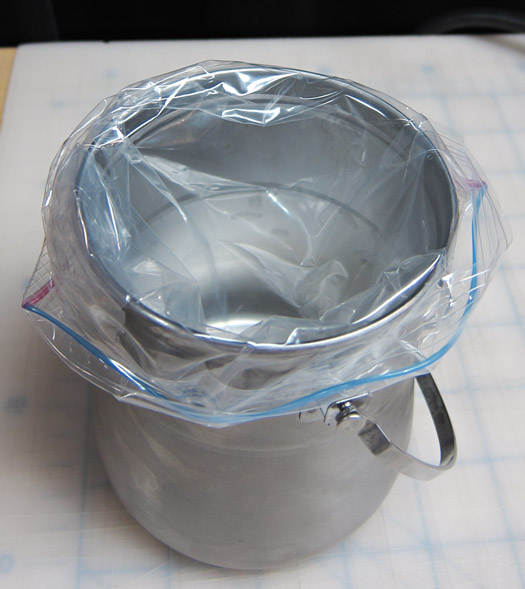
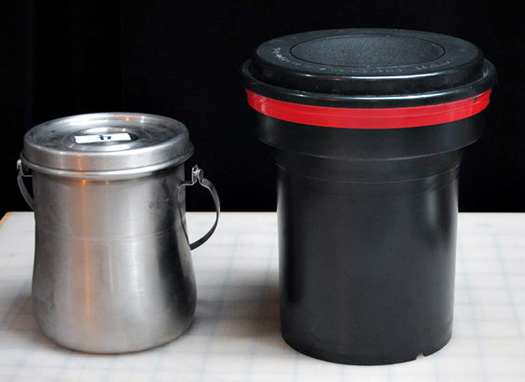
You need something absolutely lightproof to store first the emulsion and then the washed noodles in the refrigerator. Waterproof is important, too. The ziploc baggie turned into the stainless steel canister has cold water touching the bottom. When the emulsion is poured into the baggie after Step One it stops ripening immediately. Since ripening time and temperature are emulsion variables, fast chilling allows for more consistency in the final product.
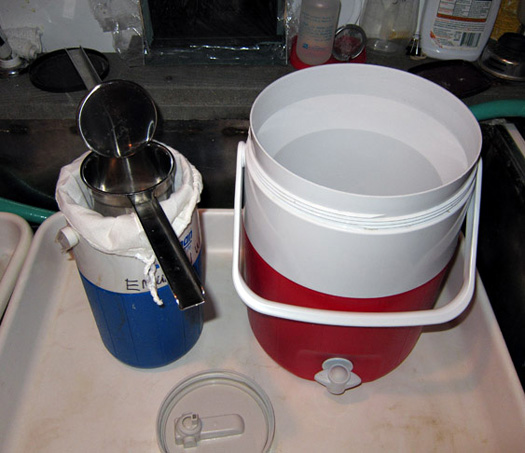

'Noodling'/Shredding and Washing step: After the emulsion in the ziploc baggie sets up in the refrigerator, it will be a cold, rubbery ball that will just fit in a potato ricer (excellent quality stainless steel, not galvanized). Before you go to red light, have things ready so that both thermos jugs are full of ice cold water. Put a cotton jelly straining bag over the mouth of the smaller thermos just like you did with the plastic baggie. Ice water will seap through. Set the open potato ricer in the thermos.
Go to safelight. Pull the emulsion ball out of the baggie and place it in the ricer and squeeze the emulsion through the holes. Be careful not to lose any shreds. Use a scraper to get everything. Tie up the bag very tightly and place the lid on the thermos. Go through the washing protocol.
I didn't want to use up a bag of ice for an illustration, so imagine the bigger thermos is full of crushed ice and tap water. During the washing steps, use it to replace the wash water in the smaller thermos.
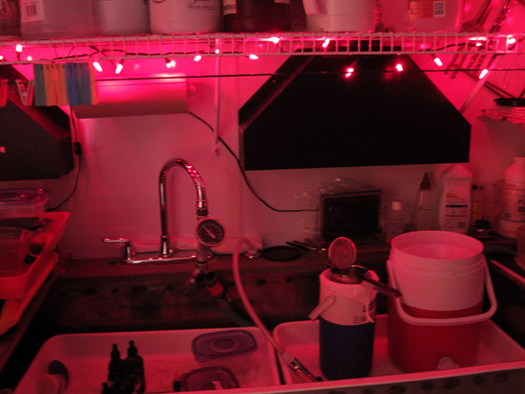
All the emulsion work is done in bright red light. A string of Christmas LED mini-lights is perfect. (I highly recommend LED lights. Budget incandescent 'darkroom' bulbs can be a disaster.)