Overview

Contact Printing


 Site Index 


Contact Printing

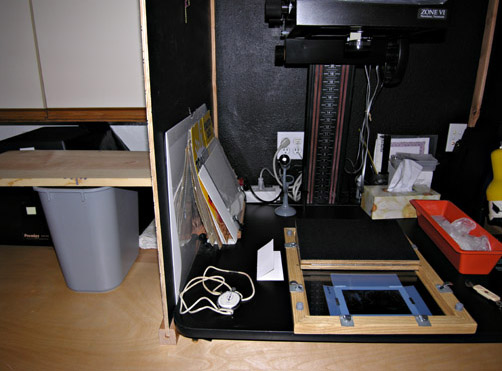
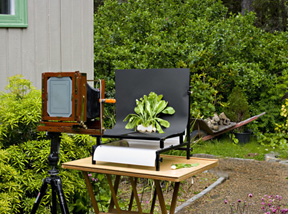
The early photographers were onto something. Contact printing couldn't be easier. Ignore the enlarger! Sandwich paper with negative in a contact printing frame and stick it under a light bulb. I am currently using a 75-watt halogen flood set 4 ft from the paper. The board on a wastepaper can is the "printing table". I time with a stopwatch. I orient the negative to fit on the emulsion with room enough to spare to use the beautiful black emulsion as a border. Celebrate the process.
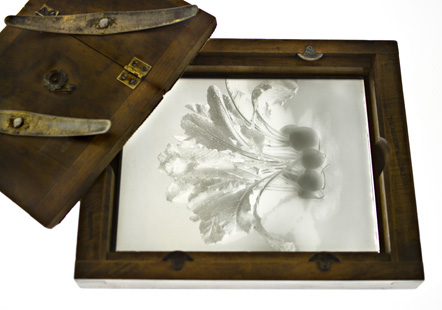
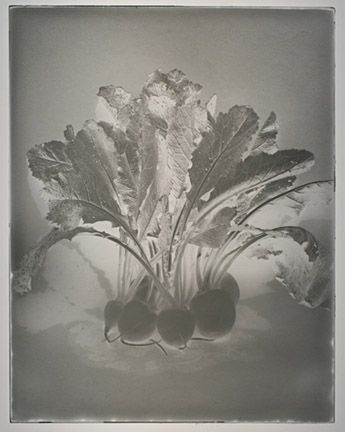
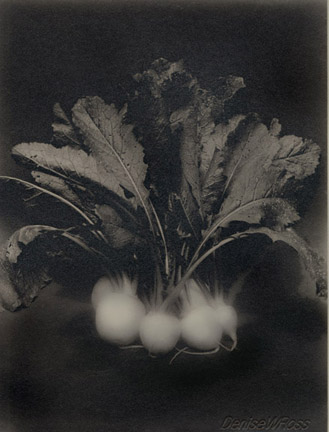

Effect of Printing Light

The quality of the printing light has an effect on the character of the final print. The top print was printed with a 65W E6 flood (Philips Duramax) at 3 ft for 10 sec. The bottom print was made with a GE 75w halogen flood at 4 ft for 4 sec covered with one sheet of YUPO paper. All other factors were equal: 'I' emulsion, 'Def55Dwr' developer, selenium toning.


Contact Printing Glass Dry Plate Negatives

Contact printing glass negatives couldn't be easier, but you have to find the right size frame, one that precisely fits your glass plate, because the plate is the glass in the frame. This probably means you'll need to find an old frame or make your own out of a sturdy picture frame. All the contact printing frames currently being built are oversized to accommodate a paper border around a film negative. Make sure to check the exact size. A frame advertised as '8x10' is actually probably 9 inches x 11 inches.

Below, left: 'Turnips', a Whole Plate-size dry plate (6.5" x 8.5"), photographed on a light table. Below, right: The image file — inverted, flipped and edge-cropped.

We modern photographers have become accustomed to a great deal of control and 'perfection' in our images. Even before Photoshop and its magic curves, variable contrast printing paper allowed many a less-than-perfect negative to be turned into excellent prints. Fortunately, we don't have to give up that kind of control even though we're working with old, graded emulsions. The old-timers made liberal use of contrast-control masks and so can we, and with an ease and precision that would have made our predecessors envious.


On the left is 'Turnips', contact-printed on handmade paper (here) with the addition of a digital contrast-control mask.

Below, left: A straight print with no masking was too flat for my taste. I could have tried a higher contrast developer. I certainly could have made a higher contrast emulsion. But, easiest of all was to make a digital mask (below, right).

I scanned the plate on a flatbed scanner and in Photoshop lightened the image considerably — determined by a great deal of experience, I'm afraid. (I didn't even think to record the numbers. Sorry! ) I resized from 6.533" x 8.161" to 6.486" x 8.111", applied a 1.0 Gaussian Blur, and printed on Pictorico OHP with an Epson 2400. I carefully registered the mask with the plate (top side, not emulsion side) laid the emulsion surface of the paper against the emulsion side of the plate and exposed and processed, including selenium toning.


Even simpler, for images that need only a little help, is to make an old-fashioned mask. To print this 5"x7" plate, I simply laid a piece of tracing paper on the glass and made a smudge of density with a soft graphite pencil over the center of the bulb — just enough to bump the highlights. I could have dodged the area during exposure, but masks make a print easily repeatable.
Enlarging

February 12, 2010: To learn about enlarging on handcoated paper, please go here.


Copyright © The Light Farm