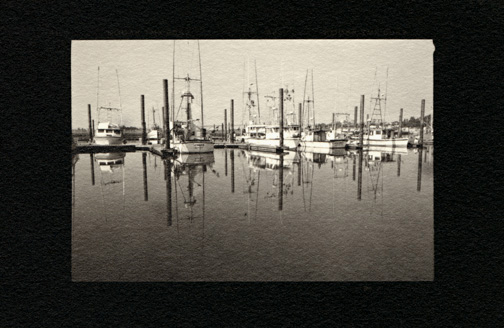
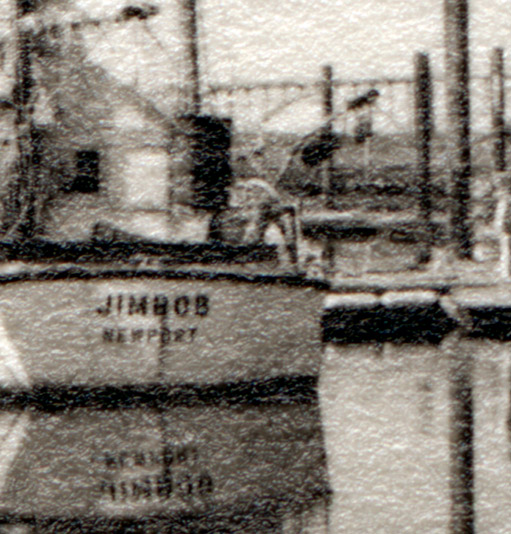
Low tech and analog all the way. A 6x9 cm TMax 100 negative contacted printed on emulsion well and puddle pusher-coated paper. Made with the Oster mixer emulsion. The image on the right is a 1777% enlargement of a 0.4 x 0.4 inch crop.
Paper and CoatingBasic (Dry) Paper Coating |
|
|
|
Low tech and analog all the way. A 6x9 cm TMax 100 negative contacted printed on emulsion well and puddle pusher-coated paper. Made with the Oster mixer emulsion. The image on the right is a 1777% enlargement of a 0.4 x 0.4 inch crop. |
|
|
Basic (Dry) Paper Coating
Up until recently I have mainly coated small sheets with a 4x5 inch 'Mowrey' coating blade. Ideally, these tools would be available in a number of sizes for an affordable price. Unfortunately, at this time, neither is true, but there are a number of coating methods that work very well. The simplest is dry paper coating. All that is required is a method of metering out emulsion in front of a coating edge. Glass is an ideal material for working with emulsions. The glass 'puddle pusher' coating rod is already a staple of the alternative processes. To the puddle pusher work flow I've added a glass emulsion well. The emulsion is injected into the well with a Kendall Monoject 35 cc syringe with catheter tip. The amount of emulsion determines how big you coat. It's very easy to make a sheet to fit your intended negative with a minimum of waste. The well and rod are cleaned between coating. This works out to just the right amount of time between sheets for the emulsion to set up a bit before you move the sheet aside to dry. About a half hour after you've coated the last sheet, come back into the darkroom to hang the sheets for full drying. |
|
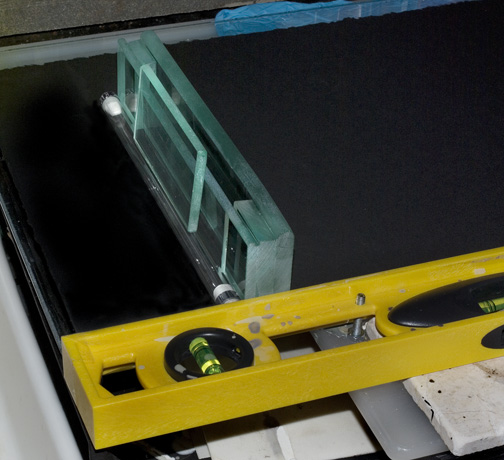
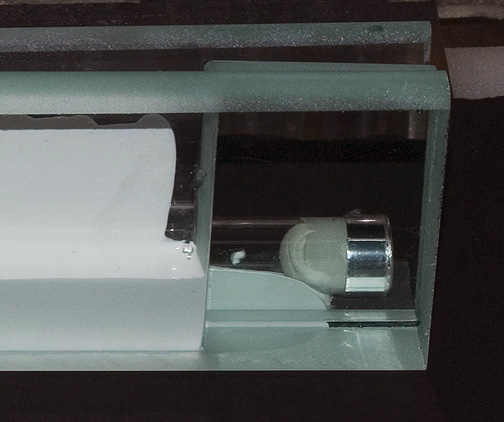
Glass Emulsion Well
To successfully coat dry paper, it is important that the emulsion be spread before it has a chance to swell the paper. This requires some sort of metering-out tool. The glass well is filled with emulsion and pulled along the paper in front of a puddle pusher prepared the same way as for wet paper coating (here). The emulsion goes down as smoothly as you could wish. For instructions on constructing an emulsion well, please go (here). If you are a glass artist or know one, you might consider making your own. My current rendition is just three pieces of glass glued together with UV-activated two-part acrylic epoxy. 1) 3/8" x 2'' x the length of the puddle pusher. 2) 3/8' x 2" x 3/4" (these are sanded dead flat and smooth on the bottom) joined with a 1/4" piece set up about 15 mil (the metering-out gap). |
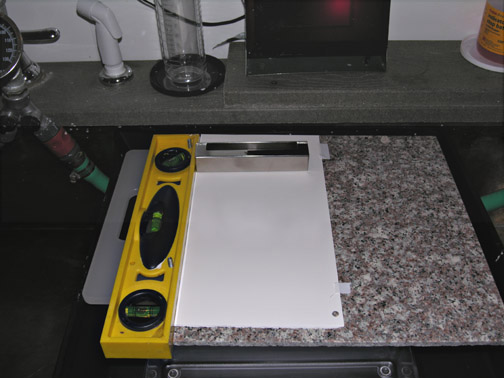 |
Paper Coating Platform
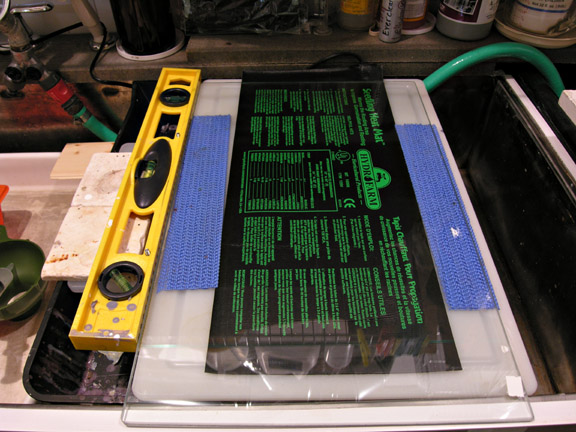
Required for coating is an absolutely flat, level surface with a straightedge guide on one side. A three-way level does double duty. Paper is pushed up along the level on one side and taped on the opposite side out of the path of the coater. This allows the paper to curl freely along its longitudinal axis after it is wet by the emulsion. If you tape a sheet of paper at the top, the paper can't move freely and the emulsion will dry unevenly. If the paper is oriented against its grain (not all papers are equally sensitive to grain swelling) the paper will washboard instead of cupping up and the emulsion will dry unevenly. Pictured here is a stainless steel coating blade sold by Photographers' Formulary. |
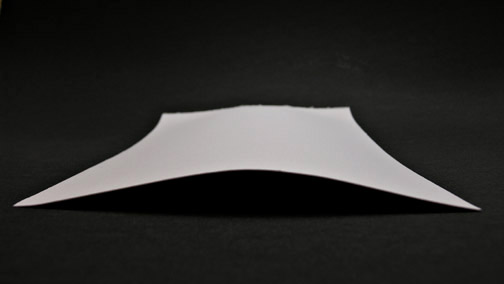 |
Longitudinal paper curl
Cupping along the grain of wet watercolor paper. This piece of paper was cut 6x12 inches, with the long dimension oriented along the grain. Note: Not all papers cup this well, but it's a good feature to look for and encourage. It helps the emulsion dry evenly. For large sheets, the weight of the paper can prevent cupping. In that case, immediately after coating, I slip a piece of 1''x 3" wood under the center to help the cupping along. |
|
A smooth, consistent workflow goes a long way toward making the process enjoyable and waste-free and it doesn't have to be complicated or expensive. I started out with a 4x5 Mowrey coating blade and designed my original workflow around it: 12 inch square granite tiles that I bought salvage for a song and a homemade warming cabinet to hold them. Before I start coating, I set paper out on the warm granite stacked in the cabinet if I'm coating with the blade, or stacked next to the acrylic sheets if I'm using an emulsion well and puddle pusher. A hole punched in the lower right-hand corner of each sheet of paper helps me keep the same orientation at each step. I pre-tear little pieces of adhesive tape and line them up on the clothesline above the sink, ready to go, and I set boards on open cabinet doors to hold the paper, on either granite or acrylic, after coating. As each sheet is coated I set aside the whole support/paper assembly on the boards until the paper is completely dry. At that point, the paper can be stacked and stored in a paper safe and the lights can come back on in the darkroom. I've always got one corner of my brain thinking about improving workflow. I hope that is true for everyone. Collectively, I know we'll solve most (and maybe even all) of the challenges. |
|
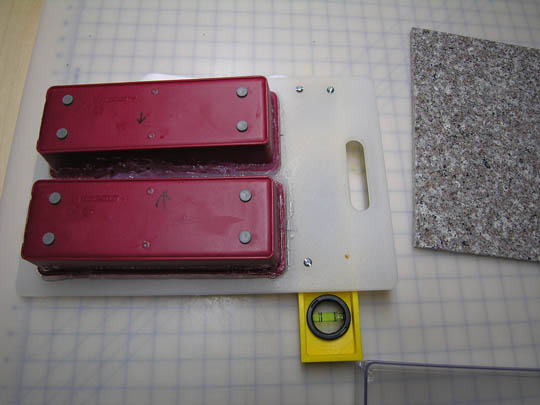
Coating Platform
Bottom side:Two drawer storage bins secured to a plastic kitchen cutting board with tiny stainless steel screws and silicon sealant. Top side: A plastic level screwed to the cutting board. The bins hold the cutting board/tile/paper up high enough that any emulsion overrun can be collected in a catch tray, and the little rubber feet on the bins keep the coating station from sliding around. During coating, the platform stays in a large tray in the sink and the tiles are exchanged as each new sheet is coated. The red safelight at the back of the sink shines on the wet emulsion and makes any coating defects easy to see and mark. If I am coating larger sheets of paper with the wet paper method, I set a piece of 14'x20'x 1/4' glass on the granite with a piece of slip-stop fabric between. If I am coating large sheets of paper with an emulsion well, I set a piece of thick plate glass with a seed starter warming mat underneath. I coat on the glass and then slip a piece of acrylic underneath to allow setting aside flat until the coating sets up. [Note:4/09. I recently built a cabinet to hold a number of sheets of glass. It's a convenience worth thinking about if you get serious about making a lot of paper.] |
|||
|
Clicking on a thumb will take you to that image; use the back button to return here. |
|||||
 |
 |
 |
 |
 |
 |
|
|
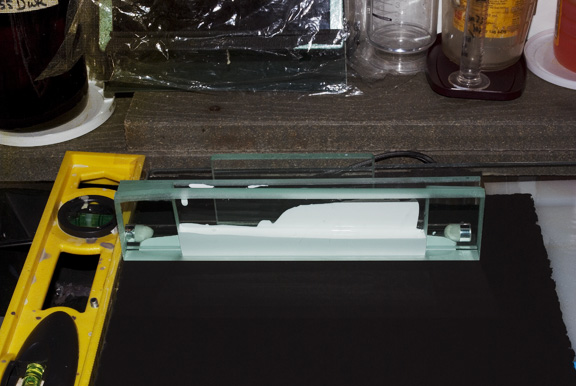
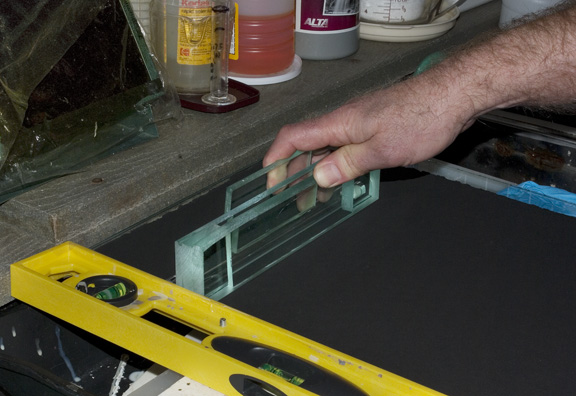
For the purpose of demonstration, I have set up the coating stage with black watercolor paper and white acrylic gesso diluted to the consistency of warm emulsion (think heavy cream). This is also a good way to practice coating. Plain gelatin doesn't have the same consistency as emulsion and handles very differently. Coloring the gesso and practicing on white paper would also work. I happen to have a supply of black paper waiting for a purpose in life. The well is set up so the the raised gap edge is in back and a puddle pusher is propped up behind it. The puddle pusher has been prepared with putty plugs and the appropriate number of wraps of 'Mylar' polyester film tape for the emulsion/paper combination being used. I used an 8-wrap for this demonstration. Please go here for more details. Both the well and the puddle pusher are kept in tight contact against the straight edge guide. |
|
|
Here is the same setup seen from the backside. I have left enough header to allow a bit of seepage at the beginning of the pull. The amount needed will vary with the emulsion/paper combo, and is determined by a little experimentation — as is the best number of tape wraps (i.e. the coating thickness) on the puddle pusher. |
|
|
Suck up the emulsion (held in a waterbath directly to the left of the coating stage just out of the picture) with the 35mm syringe. The goal is to fill the syringe and then the well with just enough emulsion to coat the length of paper you wish. When I'm testing a new paper, I start with 20cc. This will run short, but it's not wasted. Any short ends are valuable as test strips. Tip: When you fill the syringe, make sure the tip stays below the surface of the emulsion. Overfill the syringe just a bit, and then squeeze out the excess back into the emulsion reserve. This will ensure that you don't catch up any air in your fill. (Emulsion good. Air bad.) Tip: The syringe tip just fits in the well cavity. Insert it just below the top edge. You don't have to go all the way to the bottom. Start at left side, and as you are quickly and evenly depressing the syringe plunger, move the tip to the right. You are aiming to have the syringe emptied just as you get the the other side. Try to avoid aiming at the back wall and its metering-out gap. If you can fill the cavity straight down or a little to the front, you'll have more time to start the coating. Smooth and steady emptying is the key. As you get to the end, resist the impulse to squirt, because squirting will get you little bubbles, the bane of a smooth coating. I keep an atomizer of Everclear at the near right (I'm right-handed) to quickly spritz any little bubbles that might form. For a few more tips, please go here.
|
|
|
A close up crop of the previous illustration. The emulsion has started to flow out the gap in the back of the well and is stopped (temporarily) by the puddle pusher. When you start to pull the puddle pusher/ emulsion well unit down the paper, the emulsion will continue to meter out the gap to be spread evenly by the glass rod, which is elevated just enough by its wraps of tape to spread the emulsion without scraping the paper.
|
|
|
Pretend the well shown here has been filled with emulsion as in the previous illustration. Immediately grasp the puddle pusher and well together with two hands (the left mirroring the right hand shown here) and pull the unit together smoothly down the paper, keeping it up against the straight edge. It is important to keep both the glass rod and the well in contact with the paper and the straightedge, but a lot of pressure is not necessary and may even be counterproductive. Once you've calibrated the amount of emulsion to put in the well for each coating pull, you will run out of emulsion before you run out of paper. |
|
|
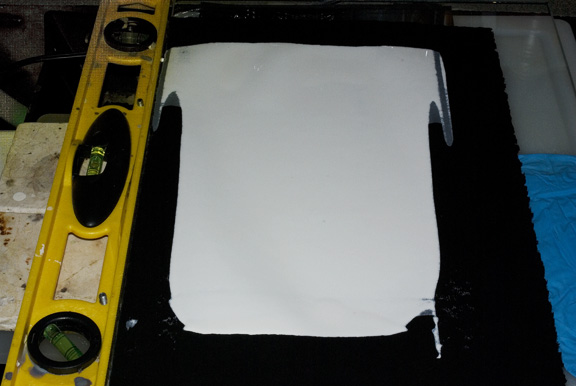
A coated sheet of paper. The wide header is a little longer than it would be in a real coating situation. The filled well sat for a minute as I took the photo for the previous illustration. Immediately after coating, place the well and puddle pusher in warm water. Clean them with the bottle brush and a wash cloth, rinse in a second container of warm water and dry for the next coating. The clean up time is just right for the emulsion to set up a bit so that the paper can be moved aside to dry. I do not hang my paper. If I'm coating small sheets on 12 inch square granite tiles, I set aside the whole assembly. (I line them up on boards set on open cabinet doors. I have a small, efficient, multi-tasking darkroom.) If I'm coating large sheets on warm glass, I wait the clean up time and then slip a sheet of acrylic under the paper and set that assembly aside. The path of good emulsion is 1/2 inch to 3/4 inch wider than the well cavity. From a 9 inch well with a 5-3/4 inch emulsion cavity the central portion of the coating is just shy of 6-1/2 inches wide. The coating is perfect up to about 1/8 inch from the edges, where it thins a bit. Therefore, the best-printable surface from this well is about 6-1/4 inches wide X as long as your arms and coating stage allow. The 12 inch well with a 12 inch puddle pusher lays down an approximately 10-1/2 inch good path. This is not wide enough to contact print an 11x14 inch negative. I am considering trying to make a wider-than-commercially-available glass coating rod and a wider well, but if I do, it will be some time in the future. Remember, if you really want to print a big negative, wet-coating paper with a 12 inch puddle pusher will work fine. Of course, anyone can make their own tools! If you do, please report the results on The Light Farm. It would be a great contribution. |
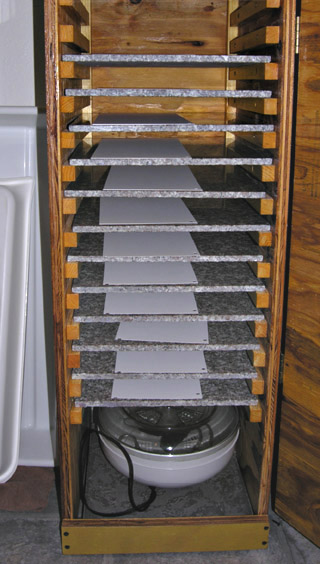 |
Tile Warming Cabinet
Because I'm still primarily developing and testing emulsions, I like to keep things small and simple. I started out with a small Mowrey blade, coating on 6x12 inch strips of paper. Although I now use an emulsion well and puddle pusher, I still like the 12 inch square warm tiles ready and easily available. If I had the room I would add another cabinet that held 14x20 inch sheets of 1/4 tempered glass. That would replace the system of coating large sheets I use now: one sheet of glass kept warm and transferring the coated sheets to acrylic. There is a door on the cabinet that is kept closed between coating sessions. The warming unit is an old fanless food dryer. I leave it plugged in so that the tiles are always warm (and because I can't be seem to remember to preheat them 12 hrs in advance!) |
|
The Mowrey Emulsion Blade
I started out with a 4x5 Mowrey coating blade and I am very fond of it. It is perfect for research. It lays down a narrow, even line of emulsion with little waste and it is easy to get an efficient workflow going. Unfortunately, the blade is too small for most work and the 8x10 inch model has an inherent design flaw. I hope that someone will pick up the manufacturing of the blades, but with better manufacturing control and for a more reasonable price. |
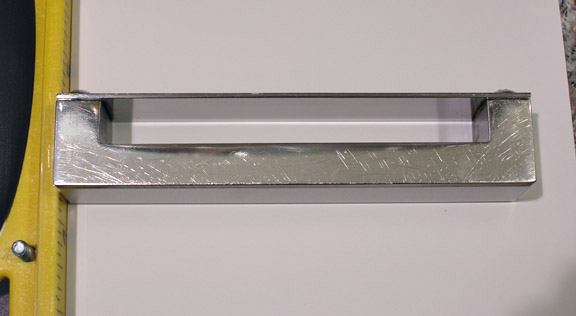 |
4 X 5 Emulsion coating blade. NOTE: AS OF SPRING 2009, THERE ARE ONLY A FEW OF THESE LEFT FOR SALE AT THE PHOTOGRAPHERS' FORMULARY. |
|
Replace This Text in js
Replace This Text in js
|
Copyright © The Light Farm |