Emulsion Well Construction Instruction
January 6, 2012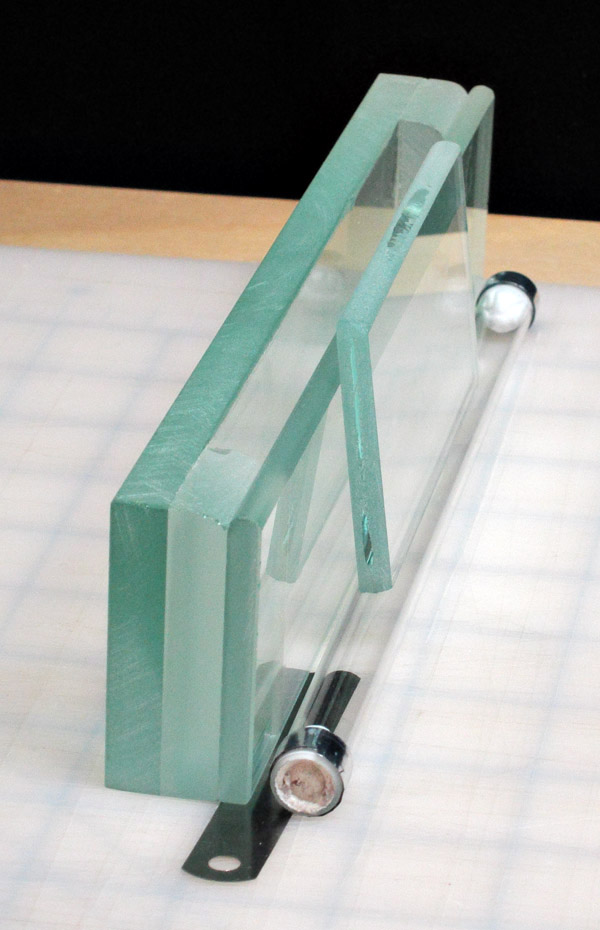
The Light Farm will no longer be selling emulsion wells. (Translation: Spouse is begging off and I don't have the arm strength for the job.) So, I'm doing what I'd intended to do quite a while back but procrastinated in favor of playing with "TLF#2". Below are illustrated instructions to show a glass artist/fabricator, should anyone want to commission the construction of one or more wells.
The emulsion wells work very well. They are not necessary for glass plate or paper coating, but I think a coating well of some kind is probably necessary for film — at least if it's important to reduce waste. I haven't tried myself (because I have wells to spare) but I can't see a reason that LF film couldn't be coated with just a puddle pusher, but roll film would be more of a challenge.
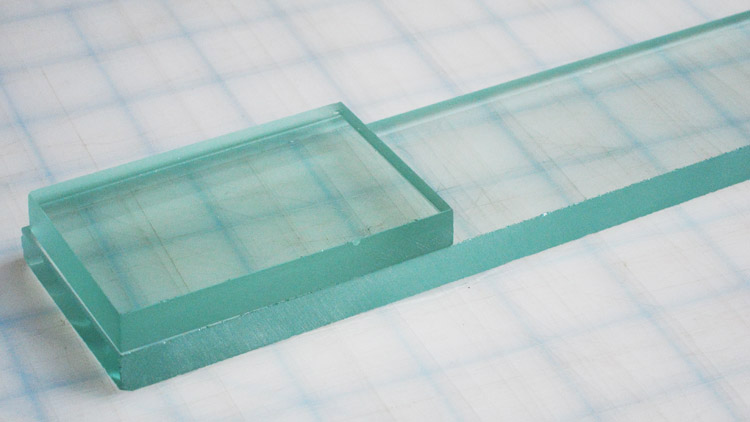
Left: An emulsion well and a puddle pusher prepared for coating. The two tools are hand held together at the head of the surface to be coated. Emulsion goes in the cavity and immediately the apparatus is pulled down the surface. Emulsion seeps out under a small gap that runs the length of the well. The puddle pusher comes tight behind spreading the emulsion very thinly and evenly. There is almost no waste. Note that the ends of the puddle pusher are wrapped in polyester tape. This raises the glass rod just enought so that it doesn't scrape the surface.
The strip of metal under the thinner piece of glass indicates the gap under that piece. The two thick pieces are dead level, dead smooth, and dead flat to the surface being coated. Getting that surface smooth and flat and the gap even across the length are the only real tricks involved. But, they are important. I'm sure a professional or experienced glass worker will have tricks and refined techniques that I've never thought of.
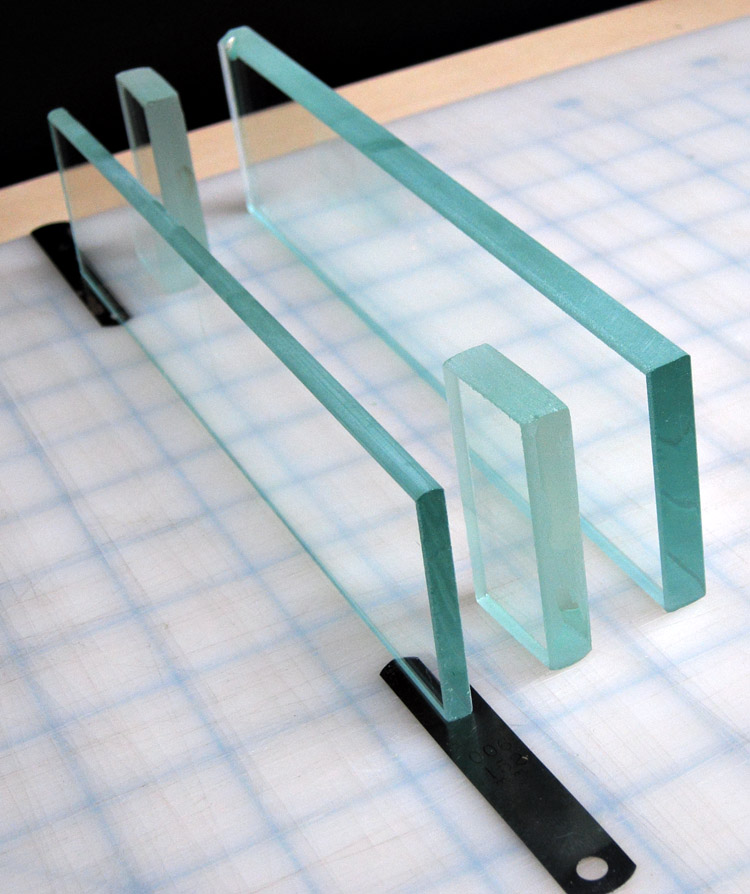
Exploded view of materials:
One piece of 3/8-inch thick glass the length of your puddle pusher (usually 5 inches, 9 inches, or 12 inches.)
Two pieces of 3/8-inch glass with a combined measure that when substracted from the length of the long pieces equals the desired size of the well cavity.
One piece of 3/16-inch glass (the gap bar.)
Also required: spark plug feeler gauges and UV curable adhesive (I use Parlite 4111 from Parsons Adhesives, Inc.)
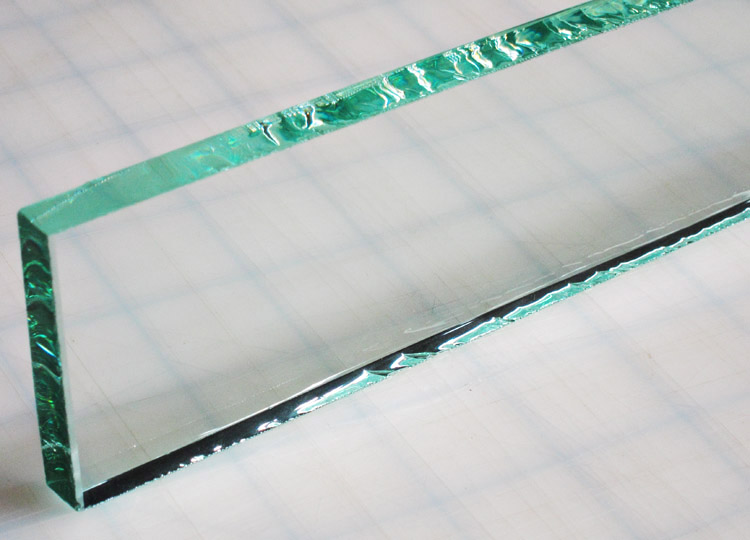
The rough snap.
After smoothing.
First bond, with match on the other end.

The well cavity (and of course, then, the width of the emulsion trail laid down) is set by the space left between the two center pieces of glass.)
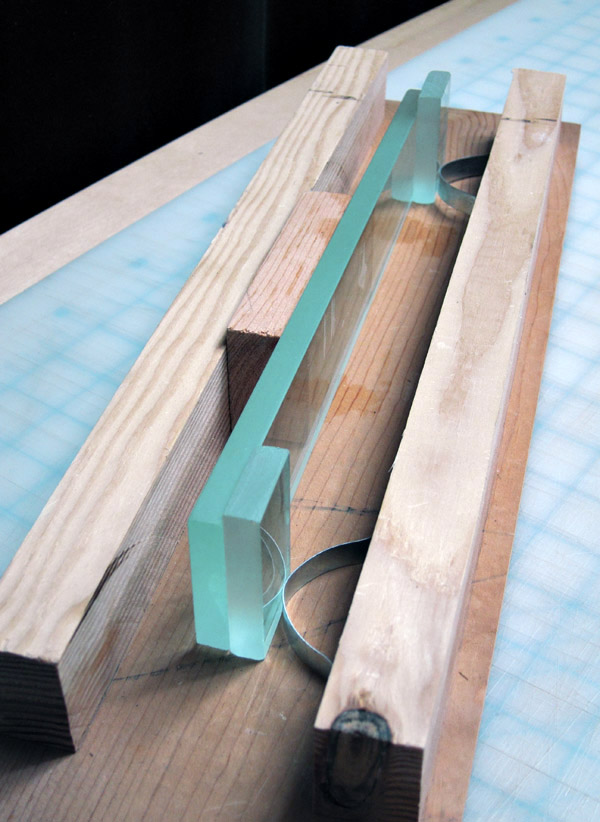
First gluing: For the wells we've made, we built a simple wooden jig to hold the glass pieces in place during UV curing. Normally, there is a piece of wax paper lining the wood.
The UV curable adhesive has a nice workable open time under a yellow bug light, but sets up very fast under UV light. I use the UV printing box that I make gum prints with.
After this bond sets up, take a razor blade to any of the adhesive that oozed out and cured on the bottom. Then, with increasingly finer grit pads, grind the bottom very, very, very smooth with a lapidary grinder. Smooth as satin isn't absolutely necessary for paper coating, but it is essential for subbed polyester. I haven't had any problems with scratches from the coating process.
The bottom must be at a right angle to the standing edge of the glass.
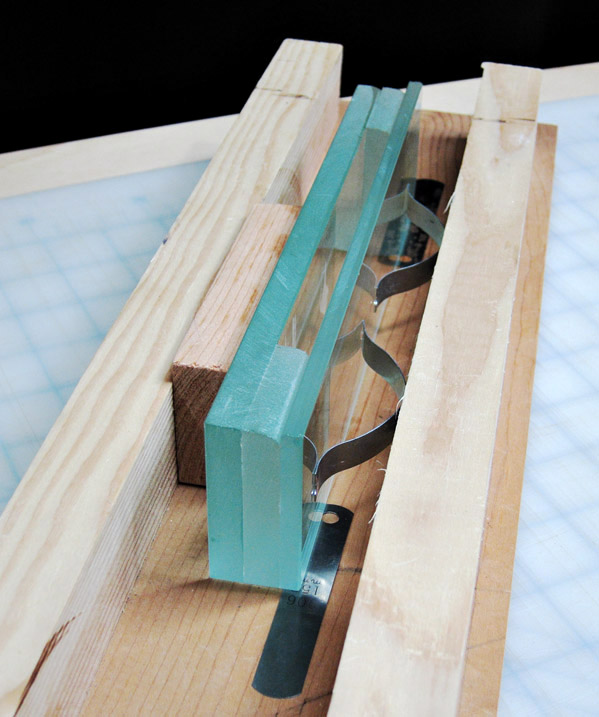
Next, the thinner "gap" piece is glued in place. Create the gap by setting the glass on matching spark plug gap measure thingys (what the heck are they called, anyway??) This is perhaps the only other essential thing, besides the baby butt-smooth riding surface. The gap must be the same across the entire length. Otherwise, the emulsion will come out at a different rate from one side to the other.
A suggestion: Have the glass fabricator make a number of wells at the same time with varying gaps and/or well cavity widths. I doubt many wells will cost much more than one (economy of scale and set-up costs) and you'll want to experiment with different exact parameters. I know I did.

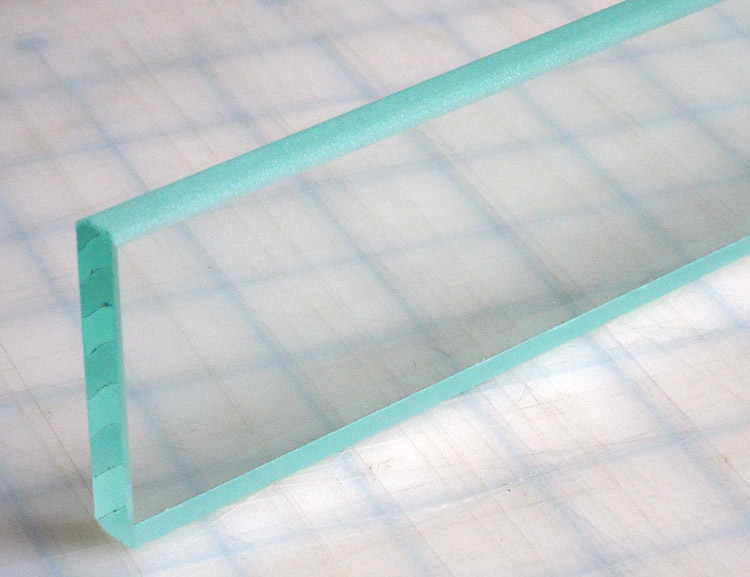
The bottom of a well.
Note that the glue line between the long thick piece and the short thick piece(s) is essentially invisible. It is undetectable by feel. And, the gap is actually very small (approximately 7 to 12 mils, depending on the emulsion and on the surface being coated.)
One Request: If you make your own well or have one made from this design, please credit first your glass artist (of course!) but also The Light Farm — and our mission. Word of mouth that silver gelatin photography can be done/is being done, by hand, is our sole coin of the realm.
Thank you.
Denise