Photo Album — Thanksgiving 2013
December 4, 2013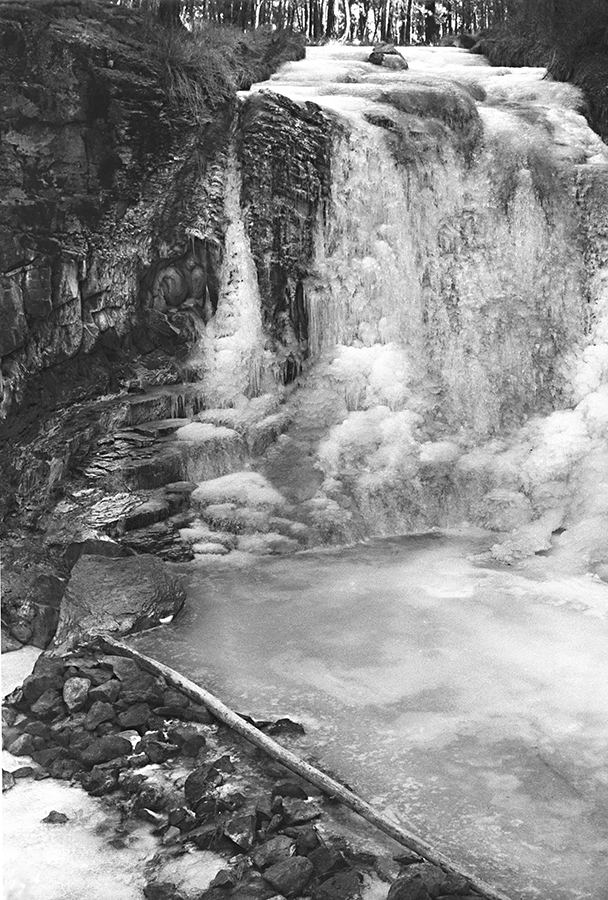
McKay Crossing Falls, Newberry Crater Area,
Deschutes County, Oregon.
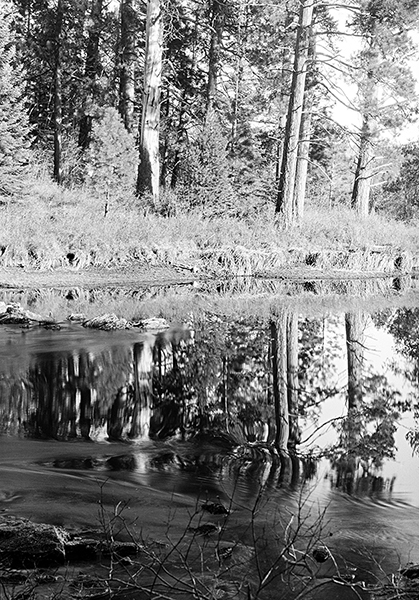
Deschutes River above Benham Falls, Oregon.
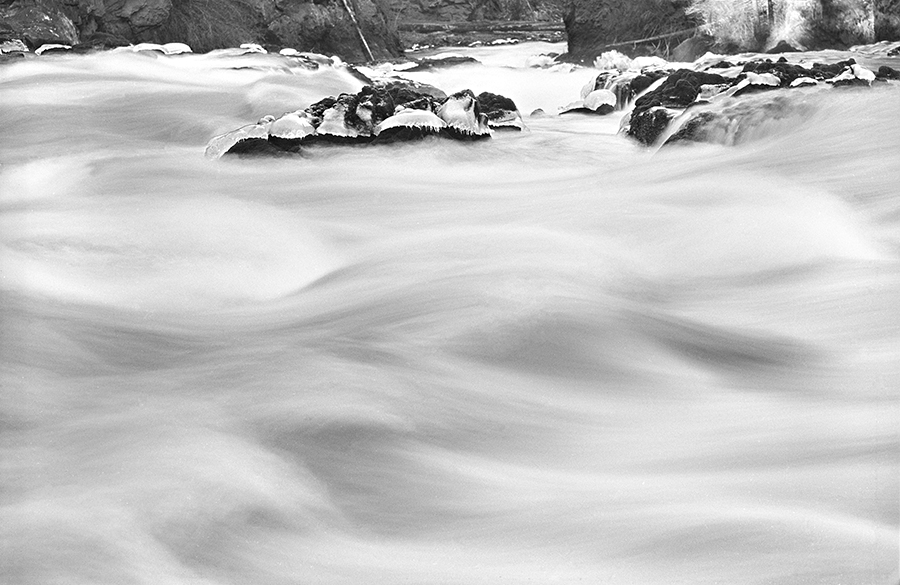
Top of Benham Falls
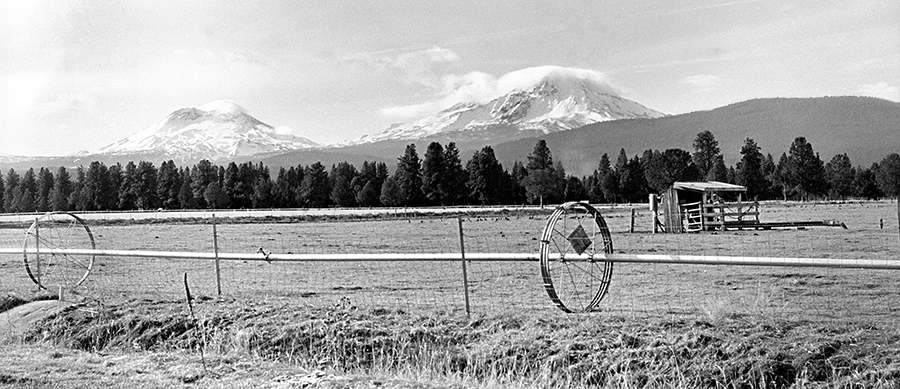
Sisters, Oregon
Colorblind vs Orthochromatic with a Yellow Filter
All the photos on this page were made with 'X2Ag' emulsion and a Baby Graphic camera (2¼" x 3¼") with a vintage 127 mm lens. 'X2Ag' in the winter is approximately ASA 25. I haven't published the recipe for 'X2Ag' yet but it is an orthochromatic emulsion, and that's the important point here.
[November 2018 update: The full recipe is in The Light Farm book, available to read for free in Blurb preview. The link is on the home page.]
Orthochromatic emulsions add green, yellow, and yellow-orange to the baseline UV/blue-violet sensitivity of a colorblind emulsion, but they are still far more sensitive to the baseline light—therefore the common practice of using a yellow filter in appropriate situations. I highly recommend Ansel Adams' Natural Light Photography and The Negative—the older late 1940s/early 1950s editions. You will truly and well understand using filters.
[November 2018 update: Also excellent, and added since this blog page was first posted, Photographic Filters, by Glover and Wakefield: here.]
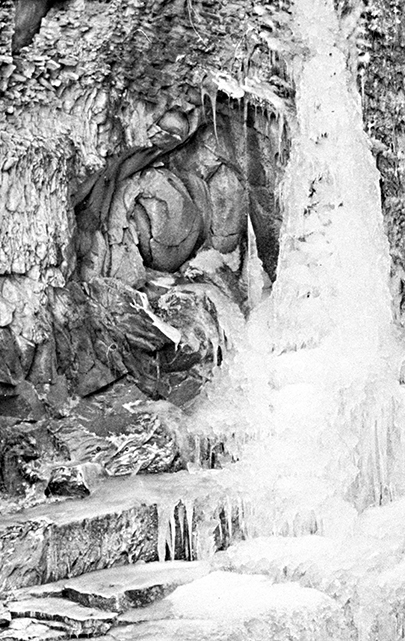
Below is one use of a yellow filter with ortho film. The photo on the left was made with a medium-yellow filter (Y8/K2); the one on the right is unfiltered. An unfiltered ortho emulsion responds almost the same as a colorblind emulsion.
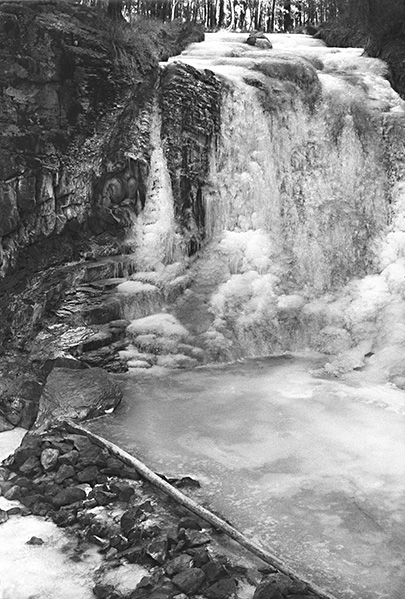
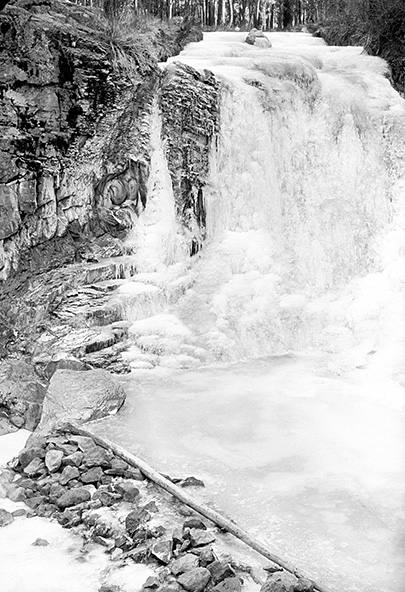
The situation was classic blue light dominance—high elevation, in the deep shade with the midday sky and sunlight outside the canyon clear and bright. Winter. The unfiltered film actually saw more light than my eyes did. Using a yellow filter (generally, Y#6 or #8), or making the emulsion mildly self-screening (yellow dye in the emulsion) helps balance out the blue light sensitivity of the emulsion and therefore gives more definition in the ice. The same is true for clouds. A white sky is the hallmark of colorblind emulsions. Orthochromatic film with a yellow filter "sees" clouds. The deeper the yellow, the more effect a filter has, but also the longer the required exposure.
Because the light had so little yellow in it, the exposure with the filter (Y#8) was many times the exposure without one (f/11 and 1 second vs f/11 and 5 seconds), and the development time was almost double. The filter cuts back on the amount of blue light exposing the film, and since there is proportionally more blue light in the shadows, the result is an increase in contrast. In the case of the ice falls, increased contrast has a big effect on defining the forms. Unfortunately, it also removes some of the luminosity from the rocks. Luminosity in shadows is the hallmark of colorblind emulsions. There are many situations where detail in the shadows is important to the image. This is when it's very nice to have colorblind film available. Currently, that means handmade.
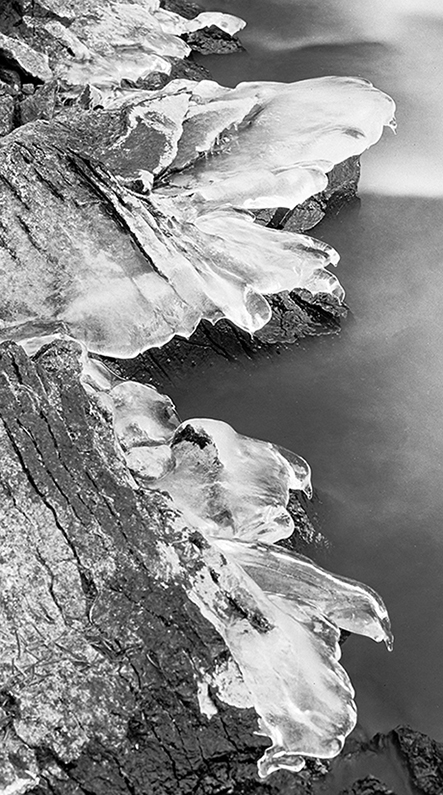
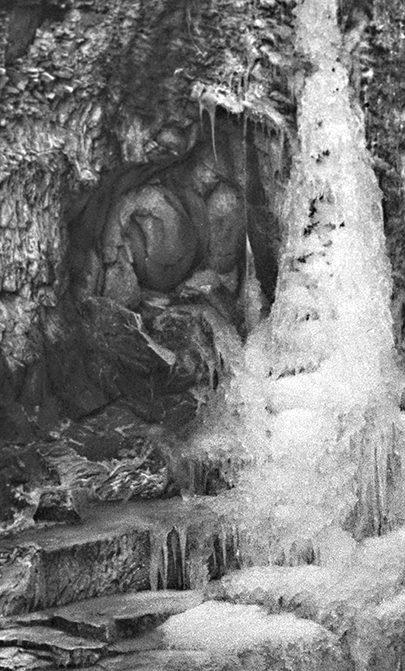
Below left: Crop of filtered exposure.
Below right: Crop of unfiltered exposure. The brightest areas of the ice are the same value in both.
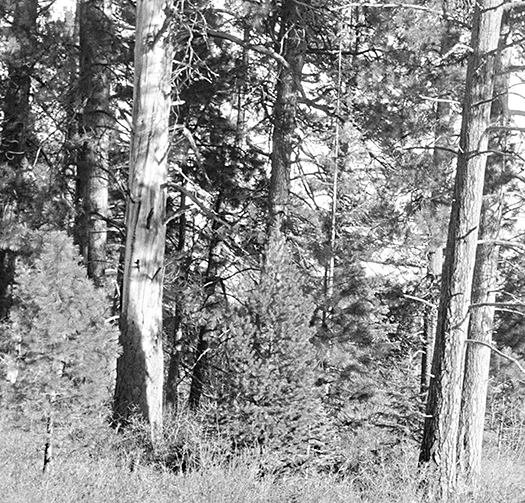
Using a colorblind emulsion (or in this case, ortho without a filter) for the photo of the trees and reflections in the river prevented the "chalk and charcoal" effect that is so common with starkly sunlit scenes and panchromatic film, especially at high elevations.
Deciding which characteristics you want in the final image—and knowing how to get there—is part of the pre-visualization process. Ansel Adams called it simply "visualization." His books, The Print, The Negative, and Natural Light Photography, should be on the bookshelf of every film photographer. The 1st editions are especially valuable to those of us working with handmade materials.