4. Handmade Silver Gelatin Emulsions—Dry Plate |
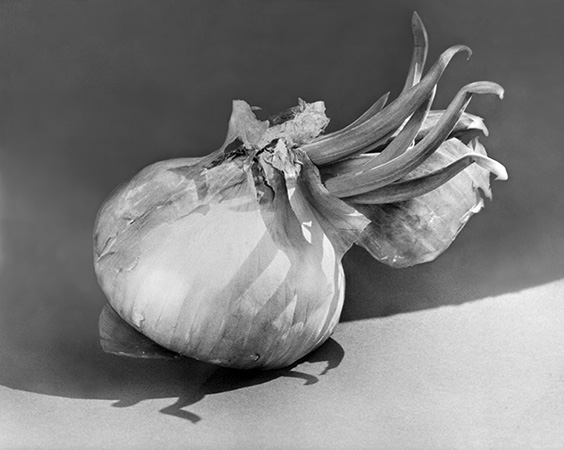
6.5"x 8.5" (Whole Plate format) dry plate negative, photographed on a light table with a digital camera and turned into a print in Photoshop |
|
Dry plate photography is simply photography. The "plate" part, of course, is the glass plate emulsion support but the "dry" part can be confusing if you aren't up on the minutia of the history of photography. Before dry there was wet, as in wet plate photography. Collodion syrup carries the photosensitive bits, not gelatin. And, indeed, the plate is wet when it is exposed. There are enough modern wet plate practitioners that it's easy to find information. It's a fascinating process, with its own distinctive beauty. And it was, and still is, dangerous, difficult, and capricious. When dry plate photography was invented, it greatly reduced all the problems of wet plate. That is still true today. If the history of photography is about anything, it is about banishing one, or all, of "dangerous, difficult, and capricious." Defenders of any next-generation iteration of our craft have always been quick to claim that the newest technology is higher quality and that photographers should always strive for the highest quality. But quality is subjective—the most personal of all artistic decisions. We are driven to make what we consider beautiful, and we are drawn to the best technology to realize our vision. The "best" is not necessarily the latest. Dry plate is one expression of beauty and one technology—as revolutionary in its day as digital is in ours. Today, we live in the best of all times for photography. We have options. In my ideal world, all the options ever available throughout the history of photography would still be out there in the local stores for purchase on a whim. Almost as good is being able to make our own photographic materials, recreating processes from anywhere along the timeline. We can mix processes from different points in history to create something brand new. When we start making our own materials the real creative potential of photography is finally realized. |
|
|
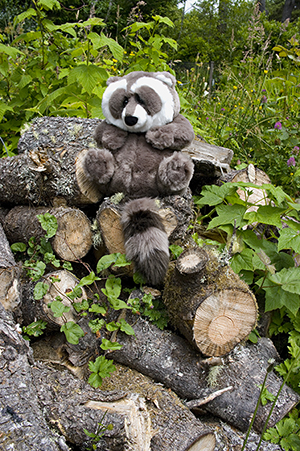
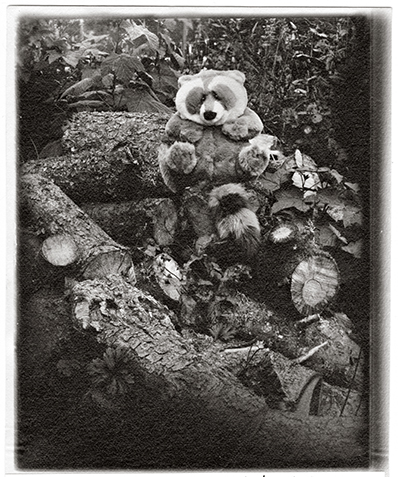
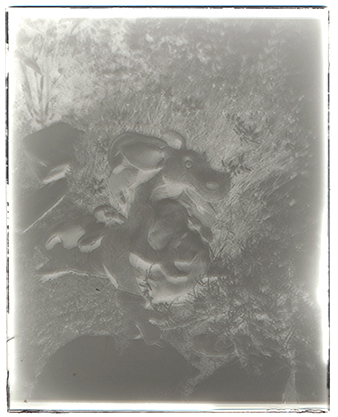
'Pancho on the Woodpile' Pancho and Possibilities 
|
|
There are a lot of options for this one plate. The density is just about what you'd think of as "normal." It's well suited for the four most standard treatments: virtual display, digital printing, traditional enlargement, and contact printing. The version above was set on a light table, emulsion side up, and photographed with a digital camera. From that point, it's handled like any other digital file. I could make either a inkjet print or an enlarged digital negative for contact printing with any number of processes. Or, I could go totally analog and use the plate just like a film negative in either a 4"x 5" contact printing frame or an enlarger. 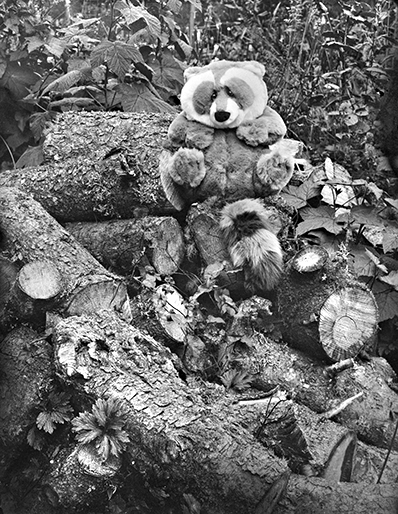
|
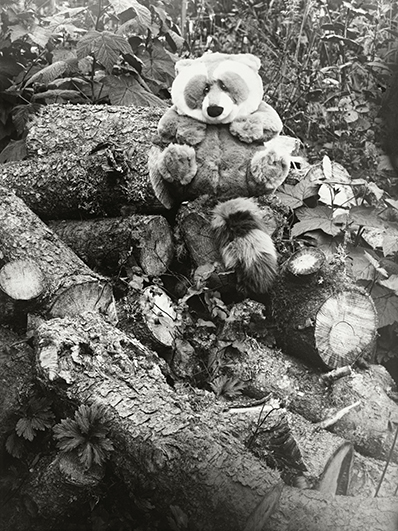
Above Left: Virtual display Above Right: 8"x 10" traditional enlargement (Ilford Multigrade) Left: Handmade silver gelatin paper contact print, selenium toned Each of these print forms are considered "normal" presentations, yet they each have a very distinctive look not easily seen on a screen. I believe that all images deserve to be seen in a physical form, but it's reality that most of our images will be seen virtually, and that's OK. More people than ever can see our art. |
|
|
|
Handcolored Emulsion Transfer This is a contact print of the same 4"x 5" plate on paper emulsion-coated Yupo synthetic watercolor paper. Yupo is wonderful stuff and I highly recommend a tablet of it in your toolbox. It's invaluable in a number of roles, but here it acted as an excellent surface for coating and exposing. During processing, however, the emulsion slips right off in a whole sheet. In the wash water it swells until it's almost half again the dimensions it started. After you finish washing (handling the sheet of naked emulsion very gently at all times) carefully slip a clean sheet of Yupo under the emulsion and lift it out of the water. Using your clean fingers, push and pull gently on the emulsion until the dimensions are the way you want them. Lay the Yupo and the emulsion somewhere flat and clean to dry. The emulsion dries securely to the Yupo. I set the transfer print on a light table, emulsion side down, and colored the backside of the print with watercolor paint. The process is a lot of fun and not near as fussy as I've made it sound here. One of the great things about Yupo is how durable it is. A sheet can be cleaned and dried and reused many times. |
|
|
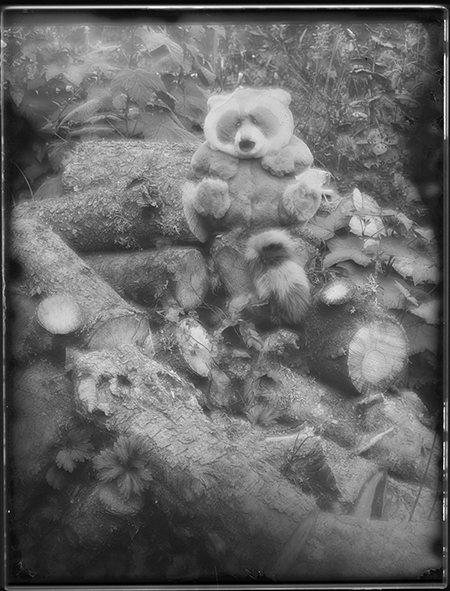
Encouraging Halation Again, the same plate, but this time I scanned it on a flatbed scanner with a transparency unit. There was no halation produced during the original exposure but when I scanned it (rather than photographing it on a light table) the light from the scanner bounced around inside the sheet of glass and created haloing around everything—a rather ethereal effect. It's good for a stand-alone virtual image or inkjet print or enlarged digital negative. It could also be printed on transparent or translucent inkjet film and handcolored on the back just like the Yupo emulsion transfer was. It's a technique crying for a creative person who would shoot the right subject matter and apply just the right coloring. |
|
|
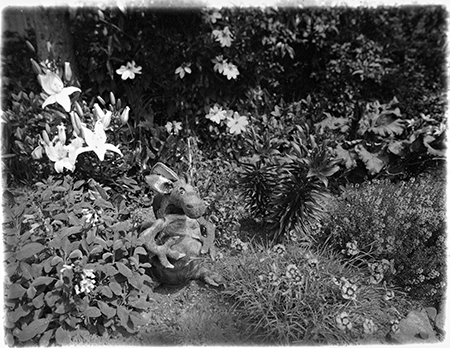
Non-Silver Prints—The "Alternative Processes" This is a carbon print from a very dense dry plate. A dry plate is just a negative and given that the variables of density and contrast must be tailored to a particular process, dry plates can be made to be printed in many ways. |
|
|
|
|
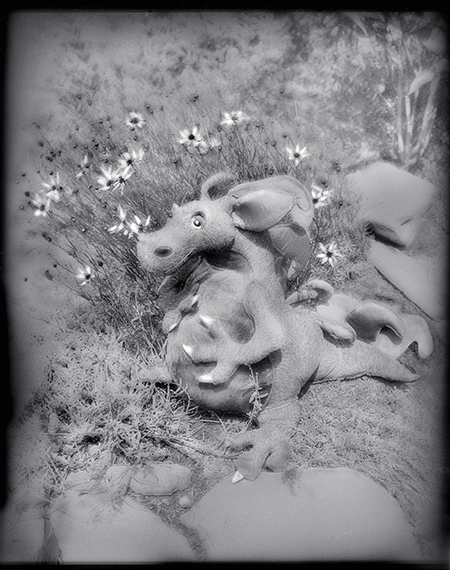
Being Open to Unforeseen Possibilities I could place this image in any number of categories. The plate quality is horrible (too-thin coating, fogged emulsion, over-exposed and on the verge of tipping toward solarization, and almost certainly poor developer choice). It would be nearly impossible to make a decent print with either traditional contact printing or enlarging. It took serious time with the Photoshop burn and dodge tools to rescue the plate, but it turned out to be one of my favorite images. So, is the plate a failure or a success? It depends, of course, on one's own personal metrics for such things and that's all that matters. |
|
|
|
Full instructions for making dry plates are in the book, "The Light Farm, Volume 1, The Basics," available to buy or read for free in Blurb preview. See the link at the top, right-hand side of the home page. Also, making dry plates is covered in the Light Farm web tutorials, left-hand column, home page. An excellent technique for coating dry plates is covered here. |
|
|
| < Boiled Down Emulsion Basics Film > |