16. Plain Silver BrI Dry Plate Emulsion—The Recipe |

|
An adaptation of Kodak Publication No. AJ-12, 1969 Revision, |

|
|
The recipe is divided into three steps. They can be completed one after another on the same day, or divided into separate work sessions, according to time available. The steps are precipitation, washing, ripening, and coating. In addition to the main emulsion making steps, time must be allocated for glass plate blank preparation, and for drying the coated plates. Before each step, line up the tools and materials required. The precipitation techniques are the same as for gaslight paper — hand mixing or magnetic stirring. Plan according to your preference. A Note about KBr: Potassium bromide almost always comes in large, rock-hard pellets. These can take a long time to dissolve or dissolve incompletely, and if there are undissolved pieces during precipitation, you could get black "slugs" or "sunspots" on the final negative. I suggest that you have a mortar and pestle dedicated to KBr grinding. I grind the KBr I use to a fine powder. A fine powder also makes weighing out easier. Keep the mortar and pestle in a plastic bag between uses. Store the ground KBr in an airtight jar. A canning jar with a tight lid is perfect. 
|
|
Step One: PRECIPITATION Pre-heat a 55°C waterbath. Salted Gelatin In a 1-cup Pyrex measuring cup or 250 ml beaker, thoroughly dissolve together:
Add:
Cover, bloom 15 minutes, and then place in the waterbath. Let sit 30 minutes, making sure the waterbath temperature comes back to 55°C. Stir in:
While the Salted Gelatin is melting and coming up to temperature prepare the Second Gelatin and the Silver Solution. Second Gelatin Mix together, cover, and set aside:
Silver Solution Dissolve together:
Right before precipitation, temper (warm) the silver solution in a very hot small waterbath. My method is to boil an inch of water in a Pyrex cup in the microwave. My microwave is in the kitchen on the other side of the house. By the time I get the cup and hot water back to the darkroom, it's the right temperature. Warming the silver solution helps cut down on any "pepper" problems (grains of silver that develop-out black even without exposure to light). Again, a loose analogy to cooking: if you are making a custard, tempering the milk and eggs reduces the chances of curdling. 
|
|
CAUTION: At all times when handling silver nitrate, be very careful. Silver nitrate is a powerful oxidizer and stains anything organic it comes in contact with. If you get stains on your skin they cannot be washed off. They will be part of your skin for weeks. If you get silver nitrate in your eyes, the damage could be blinding. Don't be afraid, just be careful. Silver nitrate is no more hazardous than many common household cleaning chemicals. Bleach and drain cleaner come readily to mind. On a happier note, there are no hazardous fumes involved with a plain silver nitrate solution. 
|
|

|
|
Step Two: WASHING Have ready two thermos containers—one for washing and one for holding ice water, a potato ricer (or noodler of your choice), washing bag, a small rubber scraper, and the lightproof container (still covered) of emulsion, plus a supply of water if you aren't doing this next to running water. Almost fill the washing thermos with ice water. Position the washing bag over the mouth of the thermos. Set the bowl of the ricer in the bag and ice water. Note: No matter how you are noodling, the idea is to do it into the ice water so that the shreds stay cold and separated.
|
|
Emulsion washing is my favorite part of the making process. In the following video clip I'm running through a condensed version. I skipped scraping the noodles off the ricer. The trouble I had with the drawstrings on the washing bag is a perfect illustration-by-accident of the best thing about emulsion washing: Short of dropping everything on the floor, nothing that matters can go wrong. The ice keeps the water at a perfect temperature. The timing is loose. If the phone rings, you can leave things sitting for a few minutes. I put some music on and just chill (pun intended!) |

|
|
Step Three: RIPENING Have your plates ready for coating and a pre-heated 55°C waterbath. GO TO SAFELIGHT.
Note: Kitchen gelatin is considered active, i.e., it contains components that could cause fog if the emulsion is overheated or heated too long. So-called "photographic gelatin" is inactive. Unless otherwise specified, it has been treated to remove the components, primarily sulfur, that affect emulsion characteristics. Using it reduces one element of uncertainty from the process, but with plain silver emulsions, photographic gelatin is not absolutely necessary. |
|
Step Four: COATING Emulsion can be coated on either glass or film. Coating on Glass Dry plate negatives are emulsion coated on glass sheets, sized to fit any number of large format cameras. Go here for a description of the technique. (It is also covered in The Light Farm book.) Coating on Film 
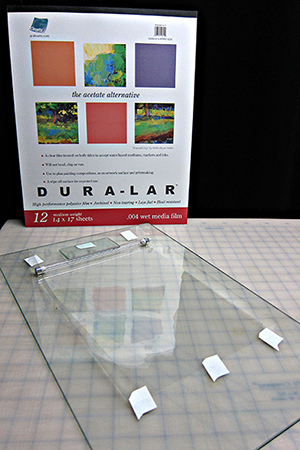
Grafix Dura-lar Wet Media Film is the perfect substrate for handmade film. It's the "wet media" aspect that makes it work. Emulsion is water-based. Untreated polyester film (PET) is naturally hydrophobic (repels water). Dura-lar Wet Media Film has been treated ("subbed") to accept water-based coatings. Coating techniques are covered in The Light Farm book and here. |

|