7. Getting Started—Paper Coating, Wet Paper Method |
|
Wet paper coating is about as easy and foolproof as coating gets. I recommend it over dry paper coating as a place to start. |
|
Wet Paper Coating with Guide Bars [January 2025 Update: When this tutorial was originally written in January 2013, I wasn't yet coating with emulsion guide bars. Today, I almost exclusively coat on wet paper with guide bars. LINK |
|
The technique is thoroughly covered in both of my books. The Blurb book, The Light Farm, is available to read for free in Blurb preview. (I repeat this so often because so often people jump into the middle of things without reading useful preambles:-) I'm leaving the original section as written because free-form coating is still a good technique and because it is probably the easiest way to start right in with making paper.] |
|
Free-Form Coating (2013) Note: I am using standard American, non-metric measurements because that's the units my glass guys want and the units I think in. I'm pretty fluent in volumetric conversions, but I'm as clumsy as most Americans about inches-to-centimeters. I'm assuming that most people outside the US can make the conversions easier than I can, or that the Great Google machine can do the deed. One thing to look out for: the unit "mil". That is not "ml" for milliliter, rather it is a thousandth of an inch. It's actually still an industry-wide standard for things like films and wire and spark plug gappers.
|
|
(The videos have been removed) |
|
I'm hoping a short video is worth a thousand words (even one done by an absolute novice to this kind of thing). The idea in this first one is to soak the paper, pull it onto the sheet of glass (closer to the top of the glass than the bottom—this allows for emulsion overflow onto the glass, rather than on your table or feet), then lay the mylar on the paper and squeegee over that to remove the excess water. You want the paper to be wet enough that it won't have started to dry out and buckle within 30 minutes, but no water in excess of that. Experience. As you finish each sheet, line it up for coating in your darkroom. Note: The third sheet is Fabriano, a grain short paper. Since I've coded all my papers with punches in the lower right hand corner when the orientation of the grain is taken into consideration, the paper goes down differently than did the Arches, a grain long paper. |
|
Again, I hope a video is self-explanatory. A couple of things to look for: With the first sheet, I took too much emulsion, and there was waste at the bottom. On the second sheet, I knew to take less. The coverage was about right, but I returned the scoop to the emulsion pot by passing over the sheet rather than above it, and I dripped "emulsion." Ouch. Real gelatin emulsion sets up fast and this would be a flaw in the coating. The third sheet is the Fabriano. Note that I'm coating with a 12-inch Puddle Pusher with the paper in a horizonal orientation, i.e., I'm coating with the grain. (Ignore my ideosyncratic cross-hands method. It's a combination of my handedness and of the constraints in my darkroom. Most people will probably work with the emulsion pot on their right.) |

On the left is an actual exposed and processed full sheet. It was coated without any overflow off the ends of the Puddle Pusher so the full sheet is good-to-print. The example of the blue "emulsion" shows what happens when emulsion flows past the ends of the Puddle Pusher during coating. You can see the dark blue of the extra thick areas along the edges. The implications of this are explained below in "Troubleshooting." |
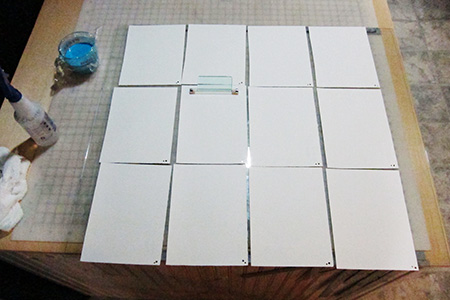
An option to prepping paper on individual sheets of glass is to prep a number of pieces of paper (usually smaller) on one large sheet of glass. My big sheet of glass holds a dozen 7"x 10" pieces of paper that can be coated with a 5-inch puddle pusher. The smaller paper is soaked and squeegeed the same way as the larger sheets, except that you'll have better luck if you line up all the wet sheets first, and then cover them with a piece of mylar as that's big enough to cover them all. I taped together four smaller pieces edge-to-edge to make one sheet. Use it tape-side up, of course. Each finished paper is generously large enough for a 4"x 5" negative or glass plate. The only trick is to avoid overspill off the bottom of each sheet as you are coating it. (That's easier if you have fewer, but longer, sheets of paper.) I find this set-up logistically easier than multiple sheets of glass. I set the sheet of glass on a folding card table in the middle of my darkroom. Setting up or breaking down, there are only two items to fuss with. I don't have perfect illumination in the center of my darkroom (see the next paragraph) but the failure rate for small coatings is very minimal. |

After coating, let all your paper set up and dry a bit on the glass. Temperature and humidity affect things, so there is a bit of trial and error to find the best time for your darkroom. For me, it's about three hours. When you know the emulsion won't run, pull each sheet of paper off the glass and carefully hang it to dry by two corners. This isn't absolutely necessary, but the finished product will be nicer to work with. A final tip: Have good safelight illumination on your coating area. I've been using the same coating platform with the same lighting since I started doing this six years ago. (For more information, please go to the third section of this page). It was one of the things I managed to get right from the beginning. It helps to coat at a comfortable level. You probably won't enjoy bending over too low, or reaching too high, for long. You should have safelight illumination shining on the paper, such that when the emulsion is wet, you can peer across the sheet and see any imperfections. |
|
Troubleshooting 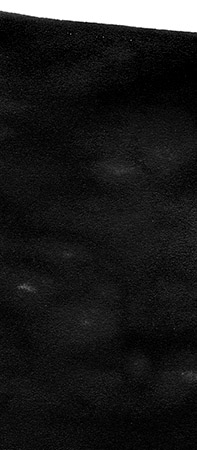
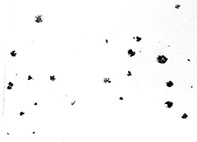
If emulsion is too warm when it's applied, it looks just like cooking oil poured into a very hot pan. It's easy to see after the paper is exposed and processed. There are irregular islands of low density and matte surface sheen surrounded by deep black. On the back of the sheet there are black spots where the emulsion soaked through the paper. Fortunately, you can easily see the problem under safelight while the emulsion is still wet, so it is easy to adjust your coating temperature before you go on to coat your next sheet. If you are coating on thicker paper, the emulsion won't soak through. The front surface will be more uniformly dull — a problem that's harder to spot during coating. If you are new to emulsion making, or if you are developing a new recipe, it is easy to mistake the effect of too-thin coating with having a poor maximum black emulsion (a.k.a. low vigor in the old literature). |
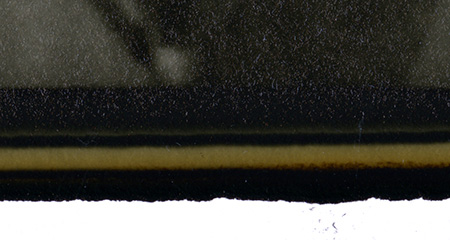
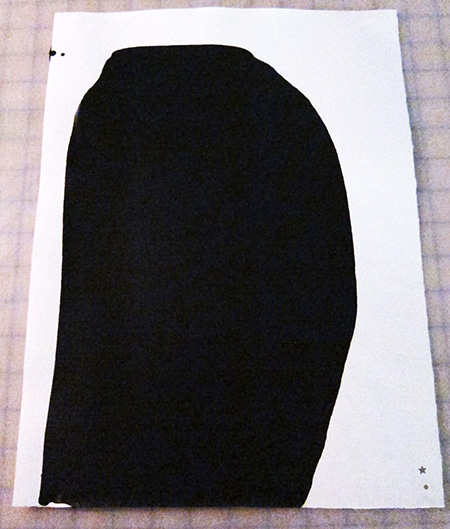
Applying emulsion that is too cool/viscous isn't the answer. Emulsion that is too thick comes with its own set of problems. The print to the left is the base K-layer for a silvergum print. To hold up to the abuse it will take by the time five layers of gum and pigment have been applied, not to mention the 45 minute soaks in water between each layer of color, the dried emulsion has to be tough as nails — and it is. The emulsion was hardened by the addition of glyoxal right before coating. Along the bottom of the print, you can see a side effect of that hardening. The outside edges of any coating are almost always thicker than the main body. When emulsion is hardened, the processing chemicals have a hard time penetrating, especially the fixer. Over time, after the print is processed and back in room light, the emulsion in the thick areas will darken. This is usually not a problem. You just trim off the uglies — well worth it to get 'tough as nails' emulsion. So, why not just harden every emulsion as a matter of course? As throughout this business, the answer comes down to cost/benefit and the simple truth that one size never fits all. Unhardened emulsion is easier to tone. It is easier to spot (a.k.a. retouching, the correction of flaws by painting with dyes). The only real tradeoff is the need to be careful during processing. Unhardened emulsion is tender. You'll need to handle it gently and at the corners all the time it is wet. You won't want to squeegee the print — rather, just pull it out of the last wash water and hang it by a corner. When it's dry, it's no longer tender. But, most important for beginners is that random patches of thicker emulsion (inevitable!) won't necessarily ruin a finished print. Your processing chemistry will penetrate even the thickest areas. |

This isn't to imply that thick emulsion is without problems even if it's unhardened. It may not turn out bronze uglies, but if it's thick enough, it will dry with a very stubborn curl that can refuse to flatten even in a contact printing frame. In any area where the negative doesn't make tight contact with the negative, you will see out-of-focus areas on the final print. |
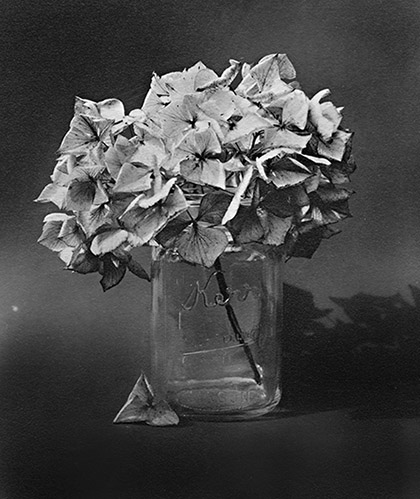
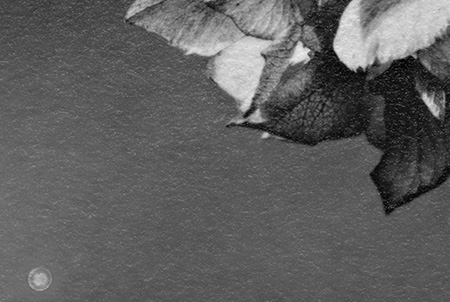
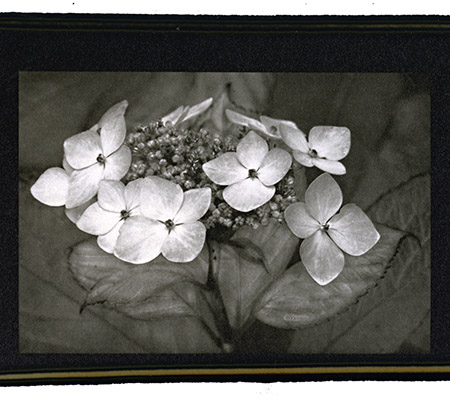
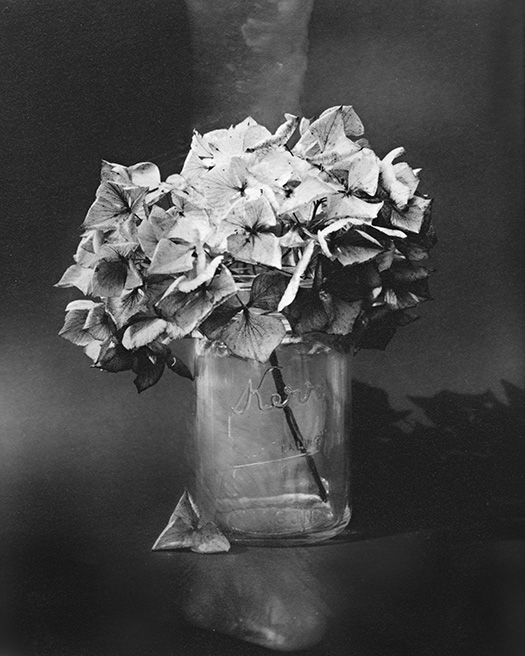
Air bubbles happen from time to time. If you have a lot of them, you may need to add a drop or two more Photoflo, but most likely an adjustment in the way you coat will solve the problem. (Experience, I'm afraid.) If you see them immediately after coating the sheet, you can get rid of them with a light mist of Everclear. I keep a small spritz bottle of it handy. The bottle came with a free sample of lens cleaner when I bought my eyeglasses. It delivers a perfect, fine mist. Fortunately, a dried bubble is easy to see under safelight, so you can often trim the paper to avoid it. If nothing else, the sheet can be used for test strips and prints. 'Long Term Memory' (the dried hydrangeas in a canning jar) is a contact print of a whole plate format (6.5 x 8.5 inches) glass dry plate, contact printed on our first recipe. |
|
One last thing—and as much a sanity alert as a troubleshooting tip: |
There is one big component of our art that is out of our control—watercolor paper. No matter how high the quality, watercolor paper is made for watercolor painters, not photographers. A couple of years ago, my emulsion started forming big, blistering bubbles during the processing. Absolutely perplexing. I made a half dozen batches of emulsion, with different changes each time, and nothing fixed the problem. It wasn't until weeks had gone by that I realized I was using a new lot of paper. Fortunately, I had a few sheets left from previous lots and those coated perfectly. Turns out Fabriano had changed the sizing recipe for their Artistico paper. I put the remaining sheets in storage and switched to Arches. I've had perfect luck with it until the last package of 90 lb HP. On random sheets, great blotches and tracks of mottled fading appeared—but not until the very end of the wash cycle. Coming out of the fix and the first 15 minutes of washing they looked perfect. I admit a silent "what the ...?!" crossed my mind. Happily, it seems I've run through the sheets that somehow (??) got contaminated with something (??) at the factory. Some things are probably puzzles never solved, so best to take a deep breathe, smile for the love of a good mystery and move on. |
|
|