Dry Plate Photography

Plate Prep and Coating - The Light Farm System


 Site Index 


November 3, 2011
Updated coating information
 

Simple-minded soul that I am, I've devised a plate-coating system that is almost identical to paper coating.  The key is extending the coating area so that the emulsion well and coating rod make contact with glass along its entire length and the plate is flooded with emulsion edge to edge. This is easily done by surrounding the plate with strips of glass the same thickness as the plate.  Leave about a 1/16th-inch gap between these 'guide bars' and the plate.  This makes a channel that the emulsion spills into, forming an emulsion band around the edge of the plate. (The guide bars are reusable, as are any plates that you don't want to keep.  Very frugal, this dry plate stuff!)  The entire glass assembly must be at least 1/2-inch wider than the coating well and long enough that the coating pull starts and stops off the plate.

The nifty tool that makes this trick work is a thick silicone cookie sheet. (This isn't to be confused with a thin, smooth silicon baking mat that is meant to replace parchment paper on a metal cookie sheet.)  Look for the heavy-duty, slightly spongy varieties.  These often come with a metal rim that must be cut off or the sheet will not lie dead flat on the acrylic.  The silicon grips the glass so that it can't budge while you are coating, but still allows easy removal after the emulsion is dry.   I bought my sheets at an outlet mall cooking store.  The brand name was le gourmet chef, but their website doesn't carry sheets like I bought, so I offer what looks like a good bet (here). My advice, though:  Don't order online.  You'll want to know for sure the sheets are at least 1/16th-inch thick and 'grippy'.  (Modified on 3/5/09: I have found an excellent source for silicon sheet material from Rubber-Cal  in Anaheim, CA.   http://rubbercal.com/Silicone_CG.html.   The material isn't quite as grippy as the cooking sheet, but the 1/16" thickness is working very well for me, and there's a lot more flexibility with size.)


Materials required:
  • Acrylic sheets, 1/4" by approx 14" x 20"
  • Small binder clips or duct tape
  • Silicon cookie sheets or thick baking mats
  • Impeccably clean glass — one plate and four guide pieces per coating set-up
  • Glass emulsion well (here).
  • Glass coating rod with handle ("Puddle Pusher®" type (here)) prepared as for paper coating (here).
  • 35mm catheter syringe (one comes with each Light Farm emulsion well) or from (here))
  • Spritz/atomizer bottle of Everclear

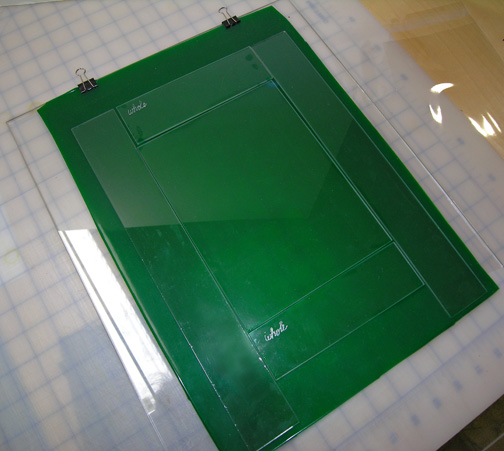
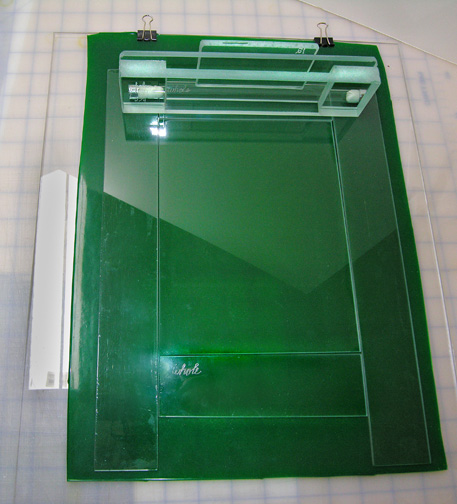
Secure the silicon sheet to the acrylic sheet with the binder clips.

Center the plate and arrange the glass guide strips around it, leaving a slight gap. (This allows the emulsion to flow over the edges of the plate and form a nice protective rim of emulsion.)

Spritz the glass with a bit of Everclear (don't flood things) and applying a fair amount of pressure, rub the glass.  This accomplishes two things: 1) a final cleaning and 2) it forms a good contact between the glass and the silicon.

Center the well, emulsion gap at the back, straddling the space between the top guide strip and the plate. Lean the coating rod on the back (gap side) of the well. (Note: In order to show the top space, this illustration has the well set too far up. It should be down just a bit so that you can see the space between the top guide bar and the plate as you look down on the inside the well.)


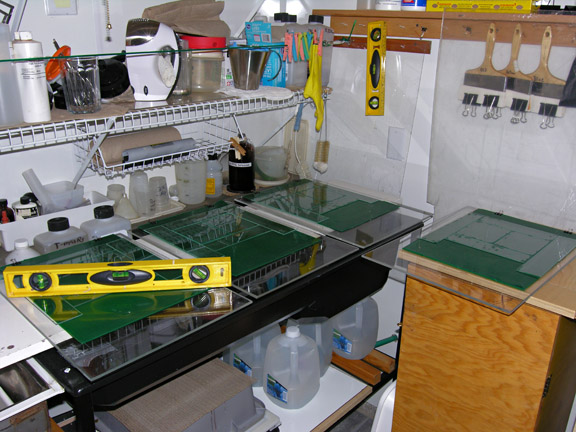
Take the time to do perfect leveling, front-to-back and side-to-side.  The first thing I do when I'm preparing to coat is line up the plates. (The set-up shown is for coating 4"x5" plates.  It works great to coat two per sheet, side-by-side.)

When the emulsion is ready to coat, I take one sheet at a time from the lineup to the coating platform and then carefully return it a few minutes after it's been coated.  The plate does its first drying step back in the line-up.

Remember: each step between the time you start making the emulsion and you have finished fixing the plate, you must work under safelight (red or deep amber.


T0 COAT:

Fill your syringe with the right amount of emulsion (at ~35C).  I use 15 ml for a 5"x7" plate, 20 ml for Whole Plate, and 25 ml for two 4"x5" plates coated side-by-side.  Stick the syringe tip in the well at the center and quickly and smoothly depress the plunger.  Immediately, pull the well and puddle pusher assembly down the length of the glass, ending on the bottom guide bar.  If it looks like any part of the channel around the plate is overtopping with emulsion, carefully suck it back up in the syringe and return this to your emulsion pot.


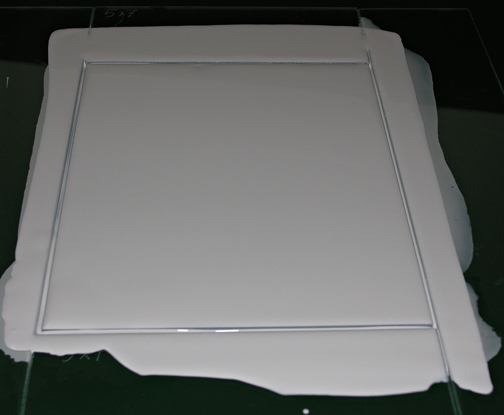
Acrylic gesso, diluted with water to the consistency of heavy cream, is an excellent coating practice material.  It handles almost identically to emulsion.  One note of caution, though.  It's messier, by far, than emulsion and harder to clean from the coating tools.  Make sure you never let it dry on the well or puddle pusher.  The good news, of course, is that you can cheaply practice coating in the light.


After the coated plates have dried enough so that there isn't a sheen left (this is easy to see under a safelight), there is still one drying step left, because any emulsion that seeped under the glass is still wet. 

Starting with one of the long vertical guide bars, lift the bar up from its clean outside edge, moving toward a 90º angle between the bar and the plate.  The emulsion that has dried in the channel will look and feel like a hinge.  Carefully bend the guide bar back and forth until this hinge breaks.  You want to avoid pulling any emulsion off the plate.  You might find that a razor blade run carefully along the 'hinge' is helpful.  Repeat this step around the plate until you've removed all four guide bars.  Get a hand under the silicone sheet and lift.  This will let you easily get a finger under one of the plate corners and let you lift the plate off the silicone without touching the emulsion on the plate surface. 

Place the plates (face up) on a fiberglass or plastic screen to finish drying.  How long this takes depends on the humidity.

After the plates are dry, you may need to remove excessive dried emulsion from around the edge of the plate or you will have trouble fitting the plates in some holders.  I use a razor blade, being very careful to leave some dried emulsion on the edges.

After your plate is exposed, processed and dry, you can remove any emulsion on the back of the plate with a damp rag, being careful of course to keep the emulsion on the image side dry.

Note: Any dust and debris blowing around in the air while the plates are drying will end up a permanent part of the plates.  Do what you need to do to assure that the air in your drying area is as clean as possible.  Having said that, there is no need to be obsessive.  It takes a fairly large particle to show up on a final print.  Our predecessors learned to spot their negatives and prints.


Copyright © The Light Farm